

How to Deep Clean a Washing Machine: Banish the Smell for Good (2026)
You pull a load of “clean” towels out of the washer, and they smell worse than they did going in. Musty. Sour. Like a wet dog that lost an argument. If you’ve ever wondered how a machine whose entire job is cleaning can smell like a swamp, you’re not alone — and yes, this is exactly what happens when you learn how to deep clean a washing machine for the first time. It’s one of those chores nobody told you about, like changing your car’s cabin filter or descaling the coffee maker. Skip it long enough, and the machine that washes your clothes becomes the thing making them dirty.
The good news: a proper deep clean takes about 20 minutes of actual effort. The machine does most of the work. Here’s the full routine — gasket, dispenser, filter, drum, and all — plus how to keep it from ever smelling again.
The 5 Signs Your Washer Is Begging for a Deep Clean
You don’t need to wait for the stench to become a household legend. Here are the warning signs:
- A musty or sour smell coming from the drum or freshly washed laundry — the classic symptom.
- Black spots or slimy residue on the rubber door gasket (front-loaders) or around the top rim (top-loaders). That’s mold and mildew, and it transfers to clothes.
- Detergent residue — a chalky film on the drum, dark clothes coming out with white streaks, or towels that feel stiff.
- Longer or smellier cycles — a washer working through buildup has to fight harder to rinse.
- It’s simply been a while. Whirlpool recommends cleaning your washer every 30 days or every 30 wash cycles, whichever comes first, per their step-by-step cleaning guide. If you can’t remember the last time you did it, that is the sign.
What You’ll Need
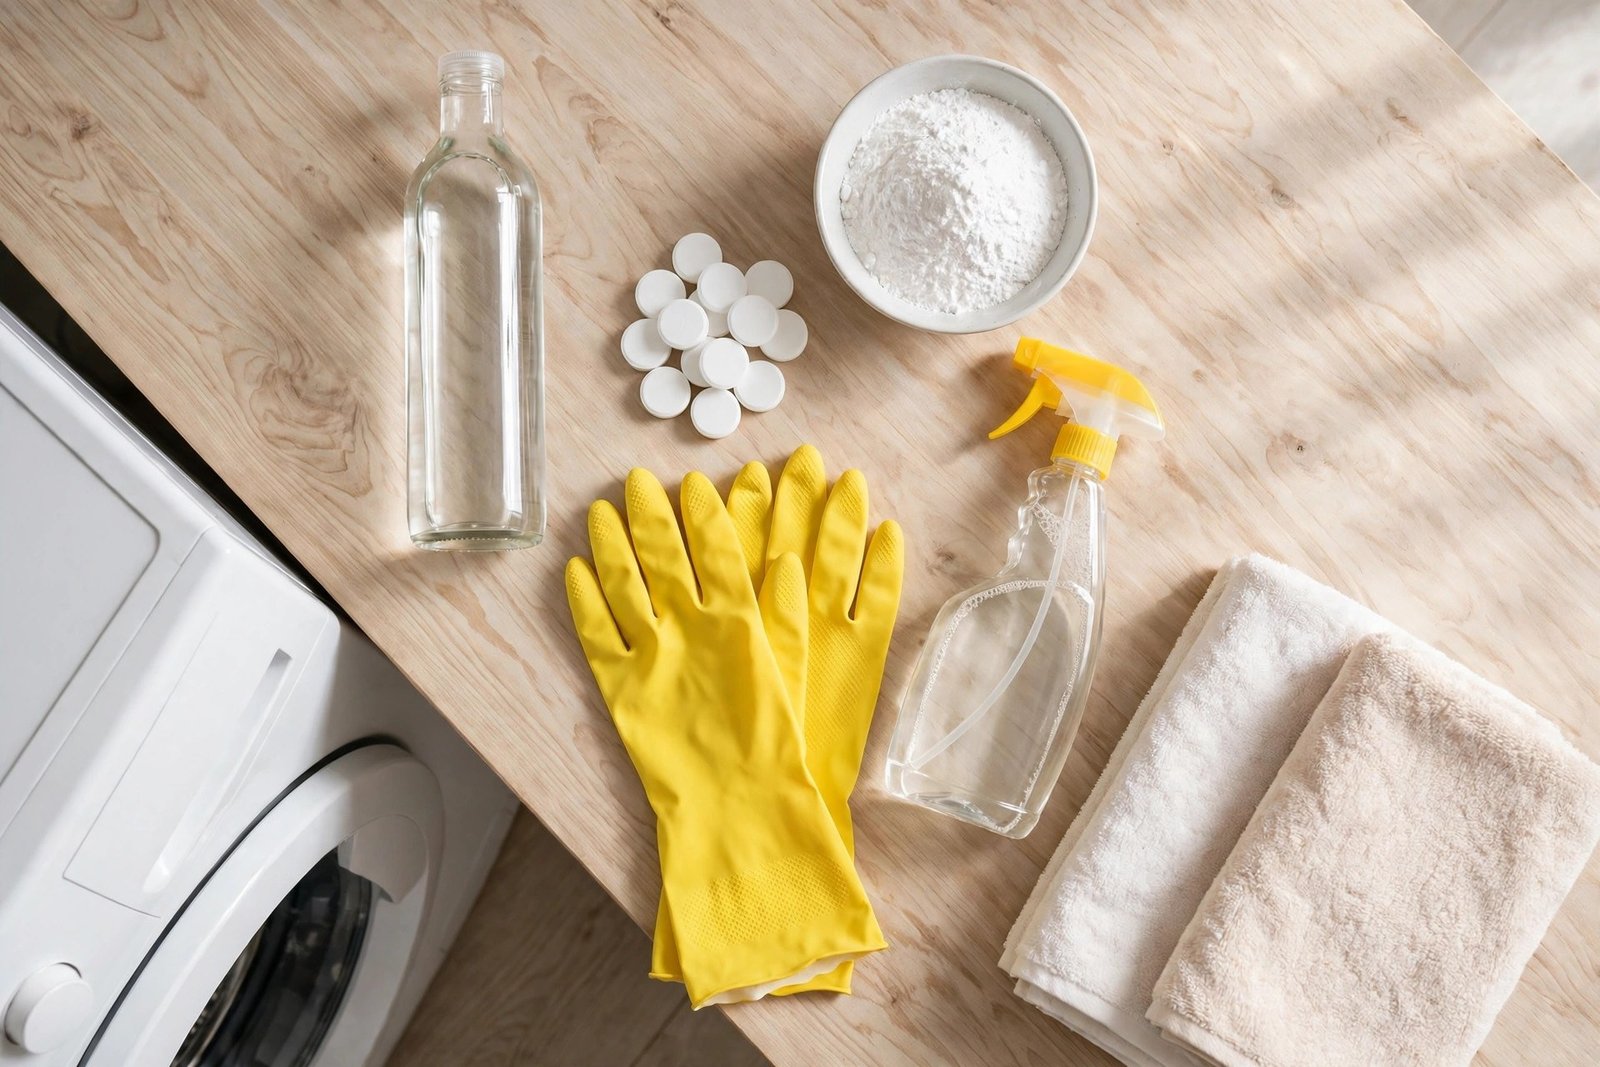
You don’t need a specialty shopping trip. Pick one cleaning agent and grab the basics:
- A cleaning agent: one washing machine cleaner tablet (Affresh is the one Whirlpool’s own guide recommends), OR 2 cups of distilled white vinegar, OR about ¼ cup of citric acid powder. Baking soda works as a deodorizer alongside any of these.
- A microfiber cloth or old towel for wiping seals and glass.
- An old toothbrush for the dispenser drawer and gasket folds.
- Rubber gloves — you’ll thank yourself around the gasket.
- A shallow pan or old towels to catch drips when you clean the drain filter.
One thing to skip: dish soap. It creates far more suds than washer-safe detergents, and any residue will foam up inside the machine on your next load. Whirlpool’s support team specifically warns against it.
How to Deep Clean a Washing Machine: The Step-by-Step Method
This routine works for front-loaders, top-loaders, and HE machines. Differences are called out where they matter. Empty the machine first — no laundry for any of this.
Step 1: Run a hot cleaning cycle
This is the heavy lifting. If your machine has a “Clean Washer,” “Self Clean,” or “Tub Clean” cycle, use it. LG’s official Tub Clean instructions recommend running it monthly with a tub-cleaning product and leaving the door slightly ajar afterward to dry the interior. No dedicated cycle? Run the hottest, longest normal cycle with the machine empty.
Drop one cleaner tablet directly into the drum, or pour 2 cups of distilled white vinegar into the drum (front-load) or let the tub fill and add it (top-load). If you’re using citric acid, add about ¼ cup to the drum. Run the full cycle, including the rinse. For a machine that hasn’t been cleaned in a year, running the cycle twice back-to-back isn’t overkill — it’s insurance.
Step 2: Scrub the detergent dispenser drawer
That drawer is a dark, damp cave of caked detergent and fabric softener — prime real estate for mold. Pull it out until it stops, then press the release tab (usually in the center) to remove it fully. Not all drawers come out; if yours won’t budge, don’t force it.
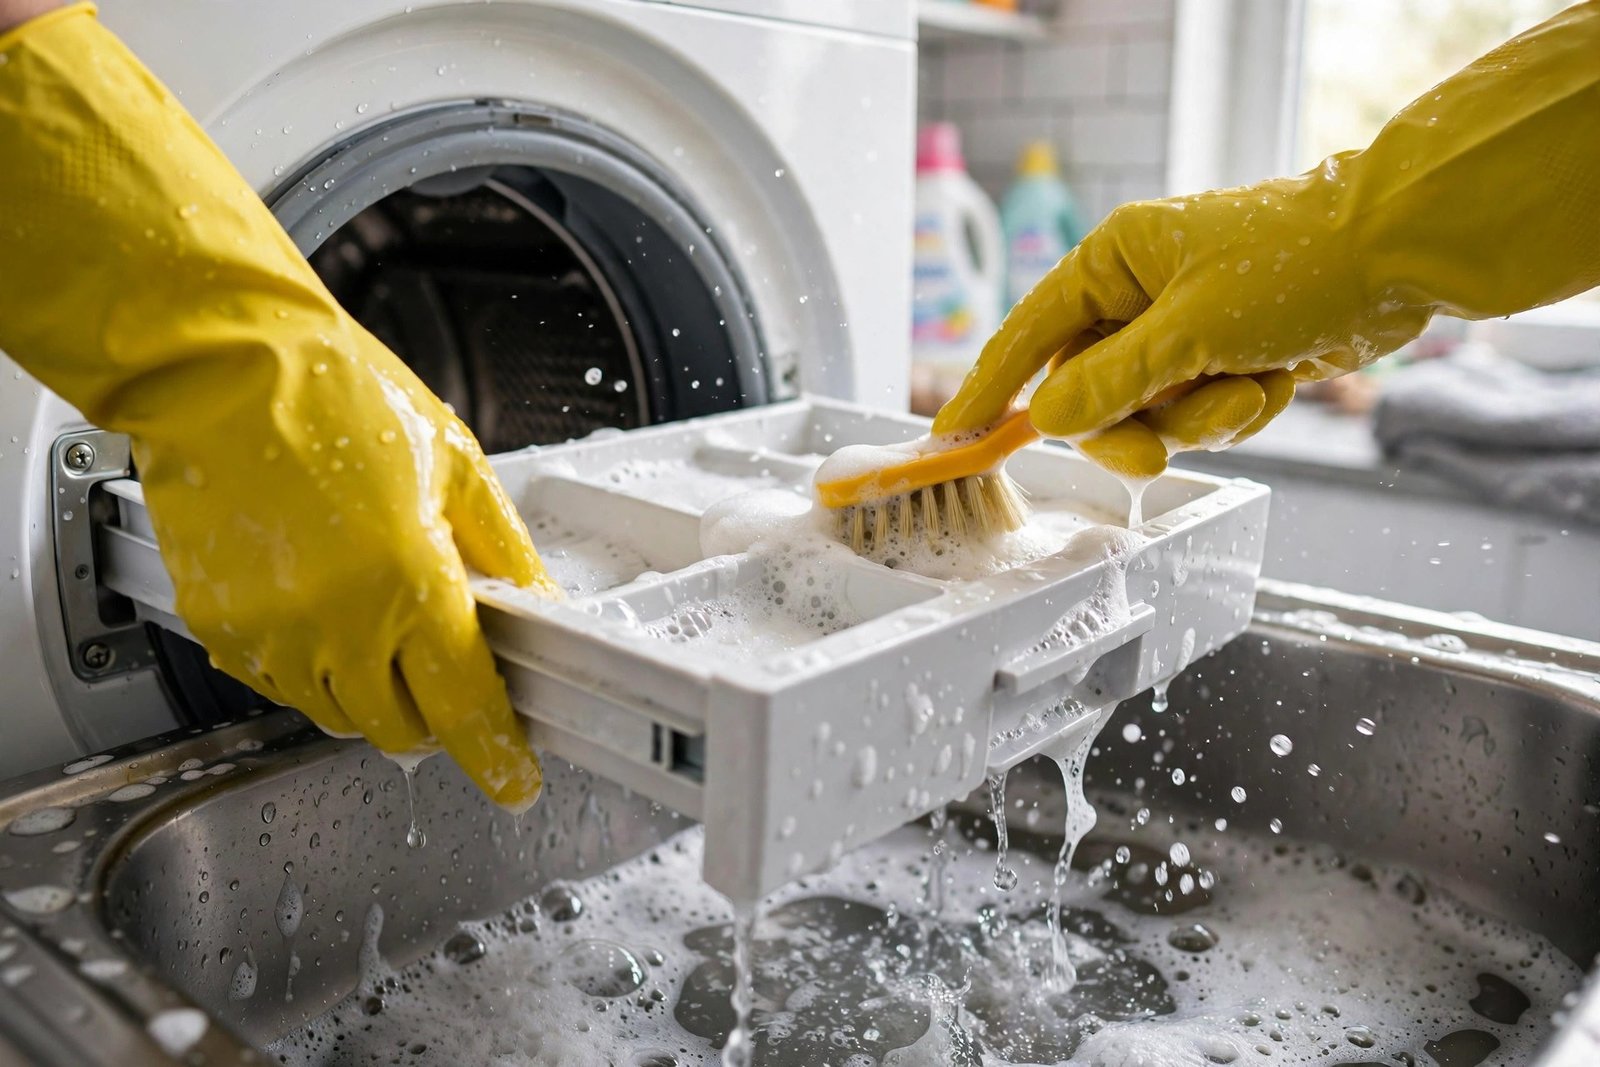
Soak the drawer in hot water for 15 minutes, then attack it with the toothbrush, especially the bleach and softener compartments. Rinse, dry it completely, and slide it back in. If you’re unclogging a drain without chemicals, you’re already in the right mindset — this is the same “hot water plus elbow grease” philosophy.
Step 3: Scrub the rubber door gasket (front-loaders)
Pull back the folds of the rubber seal and brace yourself — hair, lint, coins, and a gray-black film of mildew are all standard tenants. Mix equal parts white vinegar and water (or use diluted bleach, 1 part bleach to 10 parts water, for stubborn mold), dip your cloth, and wipe every fold. Follow with the toothbrush in the creases, then a dry cloth to remove all moisture.
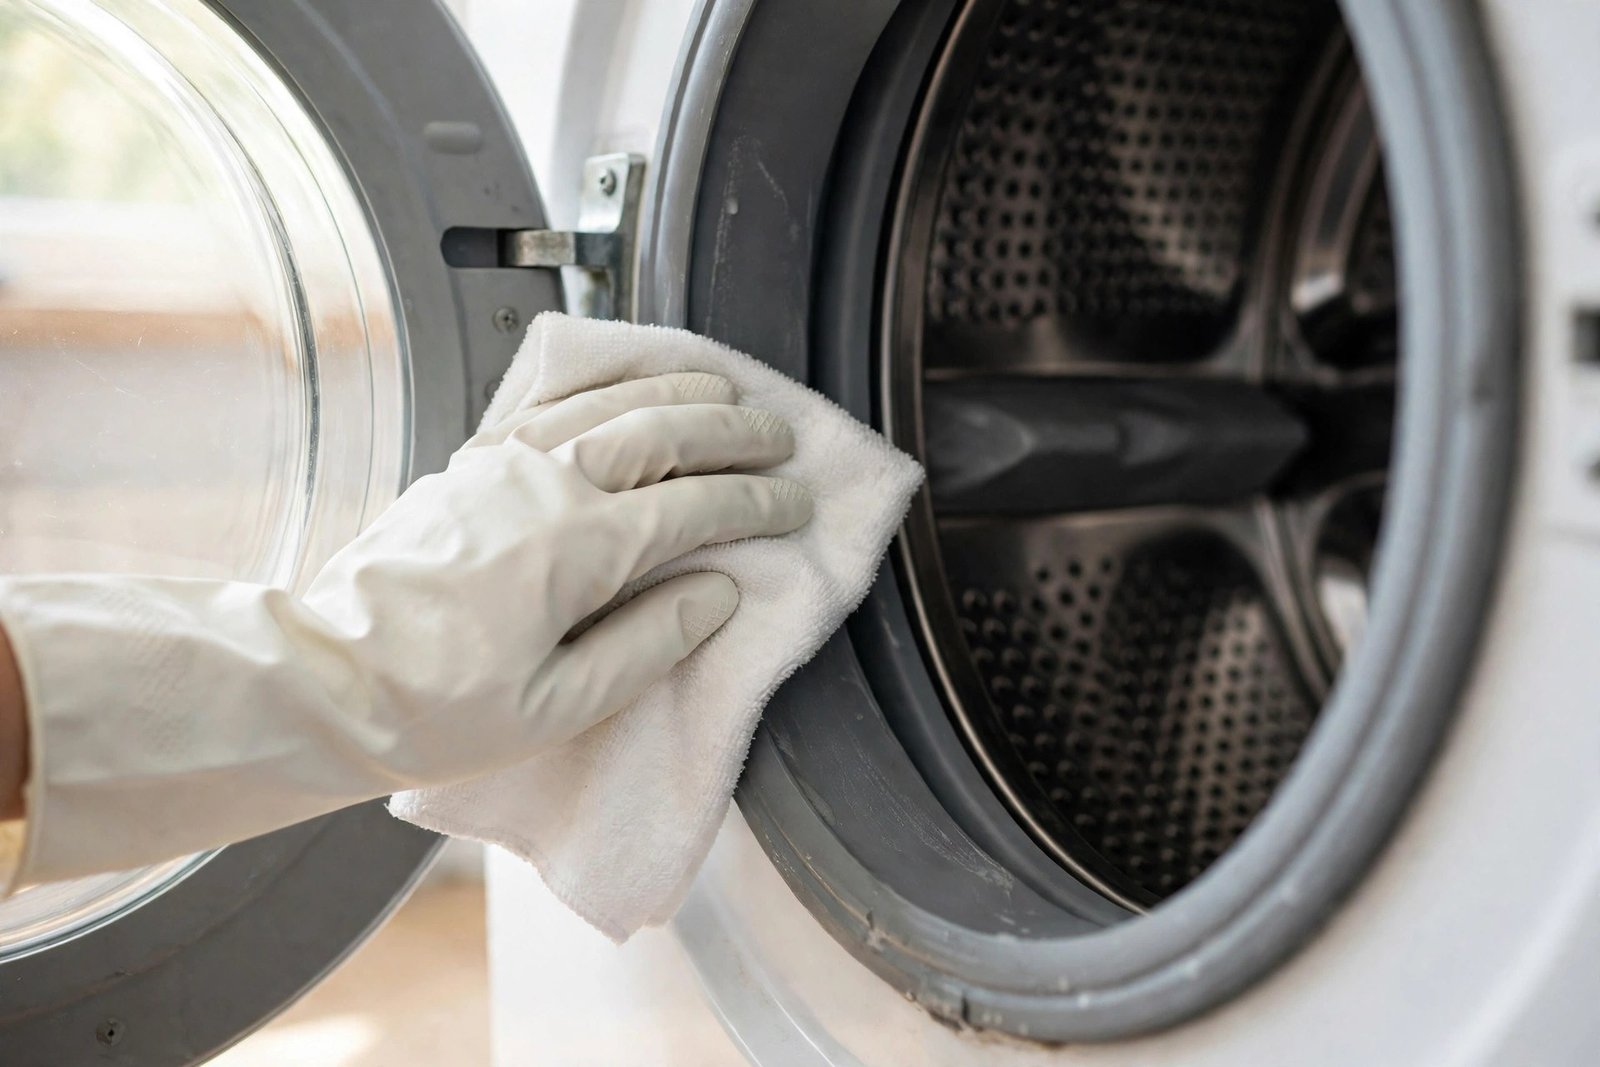
Leave the door wide open afterward so the gasket dries fully. This single step eliminates the majority of front-loader odors.
Step 4: Clean the drain pump filter
Most front-loaders (and some top-loaders) hide a drain pump filter behind a small access panel at the bottom front of the machine. This filter catches everything that shouldn’t reach the pump — coins, hair ties, sock orphans. Put your pan and towels down first, then slowly unscrew the filter counterclockwise. Water will drain out; that’s normal.
Rinse the filter under hot water, scrub off the slime, check the cavity for debris, then screw it back in firmly. A clogged filter is also one of the quiet causes of slow drains, so consider this the laundry-room cousin of clearing a clogged sink the gentle way.
Step 5: Wipe down the drum, door, and exterior
Wipe the inside of the drum with a damp microfiber cloth to catch loosened residue, then clean the inside of the door glass or lid. Finish with the exterior — control panel, sides, top — using a soft cloth and mild soap. Water and detergent drips down the front of the machine eventually migrate into the door seal, so keeping the outside clean is genuinely part of the job.
Step 6: Leave the door open
When everything’s dry, leave the door or lid ajar between loads — permanently. This is the single most effective odor prevention habit there is. A sealed, damp washer is a petri dish. An aired-out one dries between cycles and starves mold of the moisture it needs.
Deep-Clean Methods Compared: Cost vs. Your Time
You don’t have to buy a specialty product to deep clean a washing machine, but each method has a trade-off. The vinegar cycle is the cheapest option — a couple of cups from a jug you probably already own. Citric acid powder costs a little more and is particularly good at dissolving mineral buildup, which makes it the smart pick if you have hard water (and if you do, you’re probably already fighting limescale on your shower head too). Commercial tablets like Affresh washing machine cleaner tablets are the easiest — drop one in and walk away — at roughly $2 per clean based on the six-count price. A professional appliance service is the nuclear option for a machine with years of neglect, but it’ll cost you two orders of magnitude more than doing it yourself.
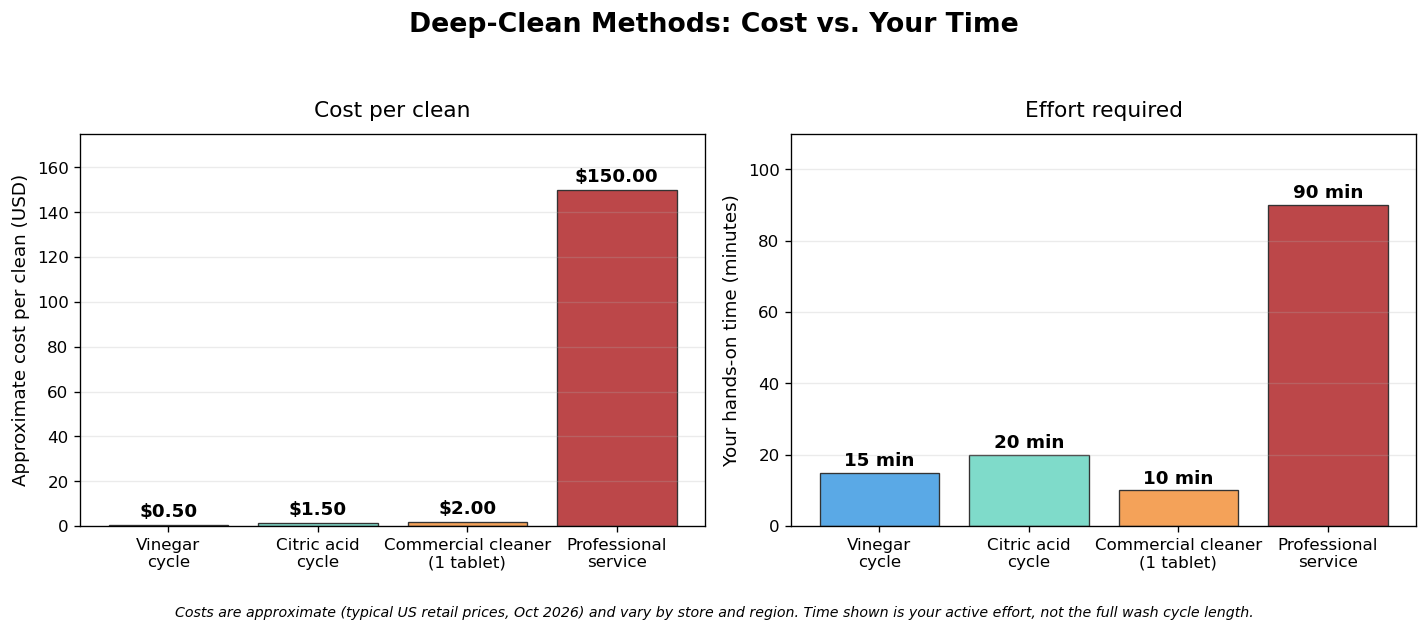
As the chart shows, the DIY methods cluster together on cost and effort: 10–20 minutes of your time and a dollar or two. That’s a strong argument for just doing it monthly instead of ever needing the expensive option.
Front-Load vs. Top-Load: What Changes
Front-loaders are the ones famous for smelling bad, and it’s structural: they use far less water (an ENERGY STAR model uses about 14 gallons per load versus 20 for a standard machine), which means less rinsing of residue, and the watertight door seal traps moisture. The gasket scrub and the leave-the-door-open habit matter most here.
Top-loaders get less mold but more hidden buildup. If yours has an agitator, check whether the cap pops off — many do — and clean underneath it, where years of fabric softener can fossilize. Impeller models (the flat-disc kind) accumulate gunk around the wash plate. Top-loaders also benefit from an occasional hot cycle if you normally wash cold; a periodic hot wash slows soil and detergent buildup, according to the Department of Energy’s Building America Solution Center, which notes that efficient machines’ low-water designs make maintenance habits more important, not less.
How Often Should You Deep Clean?
Once a month is the standard answer from both Whirlpool and LG, and it’s the right cadence for most households. Adjust based on your reality:
- Every 2–4 weeks if you wash pet bedding, cloth diapers, or gym clothes constantly — or if you exclusively use cold water.
- Monthly for a typical family doing regular loads.
- Quarterly if the machine gets light use (a vacation home, a single person’s weekend loads) — but still do the full routine, not a half measure.
Between deep cleans, wipe the gasket dry after each wash and leave the door ajar. Those two habits take ten seconds and do more than any product.
Keep the Smell Away for Good
Cleaning fixes the problem; habits prevent the encore. The big four:
- Use HE detergent — and use less than you think. Front-loaders need High Efficiency detergent only, and overdosing is the number one cause of the residue film that feeds odor. When in doubt, use the smallest recommended amount. (This pairs well with a generally tidier laundry setup — if you’re on a home reset kick, our guide to decluttering your home starts with exactly these kinds of zones.)
- Remove wet laundry promptly. Clothes sitting in a sealed drum for hours start smelling before the wash even finishes.
- Leave the door ajar. Yes, again. It’s that important.
- Run a hot cycle occasionally if cold washes are your default — it flushes the buildup that cold water leaves behind.
Frequently Asked Questions
Can I use vinegar and baking soda together to clean my washing machine?
You can use them in the same routine, but don’t mix them in the same step. Vinegar is acidic and dissolves mineral deposits and soap scum; baking soda is a mild alkali that deodorizes. Run them as separate cycles (vinegar first, then baking soda) so each can do its job, or use vinegar in the drum and baking soda as a scrubbing paste on the gasket.
Will vinegar damage my washing machine?
Occasional use of distilled white vinegar in a cleaning cycle is widely considered safe for modern machines, but always check your owner’s manual first — some manufacturers caution against frequent vinegar use on certain rubber components. If your manual objects, use a commercial washer cleaner instead.
Why does my washing machine smell even after cleaning it?
Usually one of three things: the gasket folds weren’t scrubbed (most of the mildew hides there), the drain pump filter is still clogged, or the machine needs a second cleaning cycle after years of neglect. LG’s own guidance says that for recurring odors, run the Tub Clean cycle twice, then weekly for three weeks. Also check that you’re not overdosing detergent — residue rebuilds fast.
Can you deep clean a washing machine with bleach?
Yes — liquid chlorine bleach is effective against mold and is what Whirlpool’s older manuals recommended (1 cup with detergent on hot). But check your owner’s manual first: some models discourage it. Never mix bleach with vinegar, and always run a rinse cycle afterward so no bleach carries over to your laundry.
How do I clean a smelly top-load washer without an agitator?
Same core routine: run the hottest, longest empty cycle with vinegar or a cleaner tablet, then scrub around the wash plate and the top rim where residue collects. Impeller models trap debris under the plate area, so wipe the gap between the plate and the tub wall with a cloth wrapped around the toothbrush.
Conclusion
Learning how to deep clean a washing machine feels like unlocking a secret level of home maintenance. The smell that’s been slowly building for months vanishes in one afternoon, your towels come out actually fresh, and the machine runs better. The routine is simple — hot cleaning cycle, scrub the drawer and gasket, clear the drain filter, wipe everything down, leave the door open — and once a month keeps it that way.
Set a recurring reminder on your phone for the first Saturday of the month. Future you, pulling a load of genuinely clean-smelling laundry out of a machine that doesn’t smell like a locker room, will be grateful.