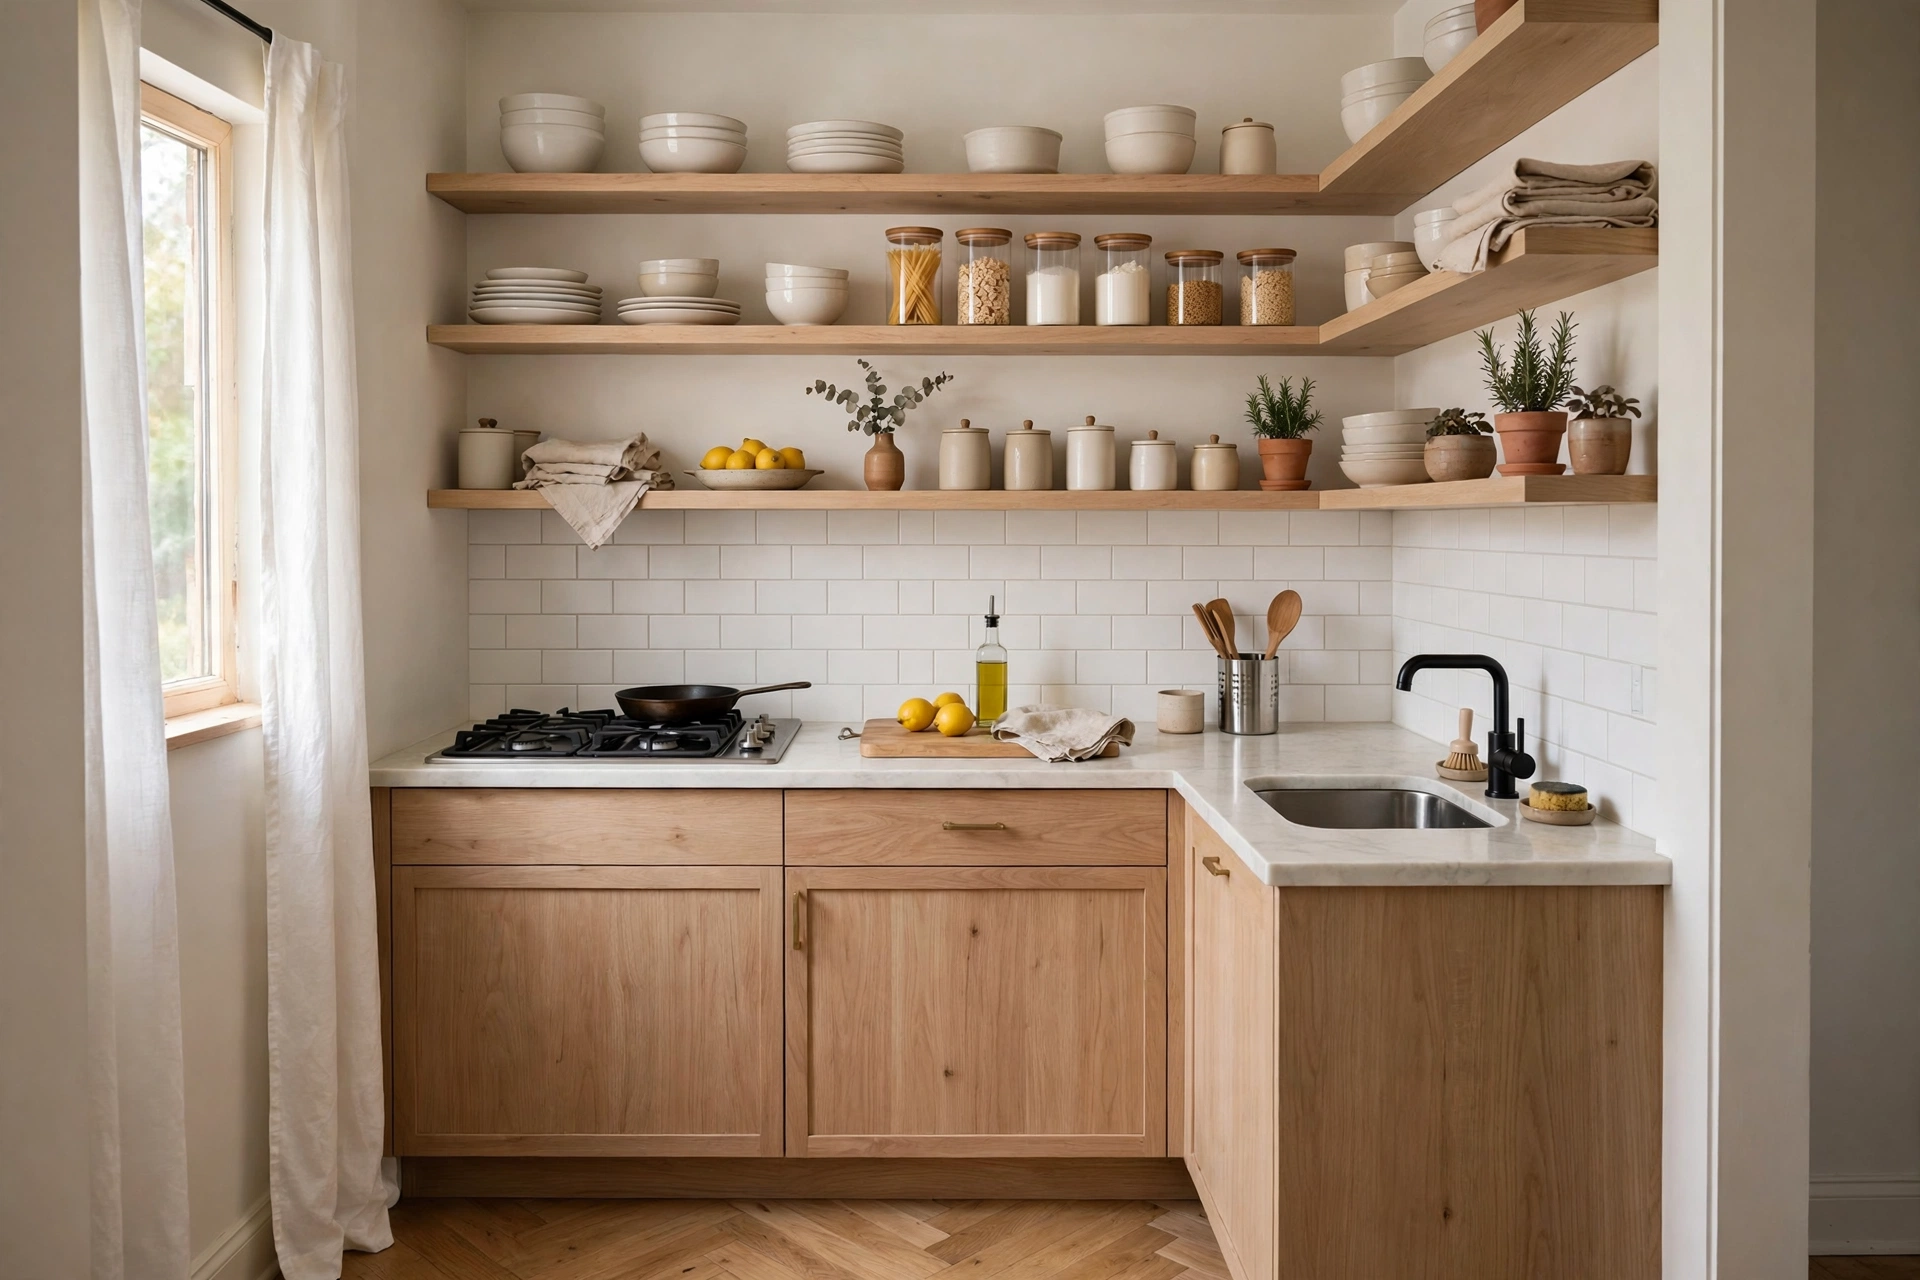

How to Organize a Small Kitchen on a Budget: 12 Renter-Friendly Ideas
Learning how to organize a small kitchen on a budget feels impossible when every drawer is jammed, the counters are buried, and the cabinet under the sink looks like a crime scene. But here is the truth most organizing guides skip: small kitchens don’t need more storage. They need better zones. With a handful of upgrades that typically cost under $30 each — tension rods, dollar-store bins, and a little vertical thinking — you can double your usable space without drilling a single hole or spending a weekend on a remodel.
This guide walks you through 12 ideas, zone by zone, all renter-friendly and all cheap. Pick three or four that match your worst clutter spots and you will feel the difference by Sunday night.
Why Organizing by Zone Works Better Than Buying More Storage
Most people attack kitchen clutter the wrong way: they buy a big organizer, shove everything into it, and wonder why the mess returns in a week. The problem isn’t the container — it’s that items have no assigned home. Professional organizers solve this with zones: every activity gets a territory. Coffee things live together. Cleaning supplies live together. The baking stuff stops migrating into the utensil drawer.
When learning how to organize a small kitchen on a budget, zones matter even more because there is zero margin for wandering items. When your prep zone, cooking zone, and cleaning zone each have clear boundaries, a tiny kitchen starts behaving like a bigger one. The 12 ideas below are arranged by zone so you can fix one area at a time instead of tearing the whole kitchen apart.
The Ground Rules: Under $30 and Renter-Friendly
Every idea in this guide to how to organize a small kitchen on a budget follows two rules. First, it typically costs under $30 — most are under $15. Second, it is renter-friendly: no drilling into tile, no permanent adhesive on cabinets you don’t own, nothing your landlord will charge you for. Everything here comes off cleanly on move-out day.
One more rule I recommend: declutter before you organize. No bin will fix a cabinet holding three broken blenders. Spend 20 minutes pulling out what you don’t use, donate it, and then organize what’s left. This pairs well with budgeting on a low income — the cheapest storage upgrade is owning less stuff.
Zone 1: Under the Sink
The cabinet under the sink is the Bermuda Triangle of small kitchens. Pipes eat half the space, bottles fall over, and you end up buying a third bottle of dish soap because you couldn’t see the two you had. Two cheap fixes change everything.
Idea 1: A Tension Rod for Spray Bottles
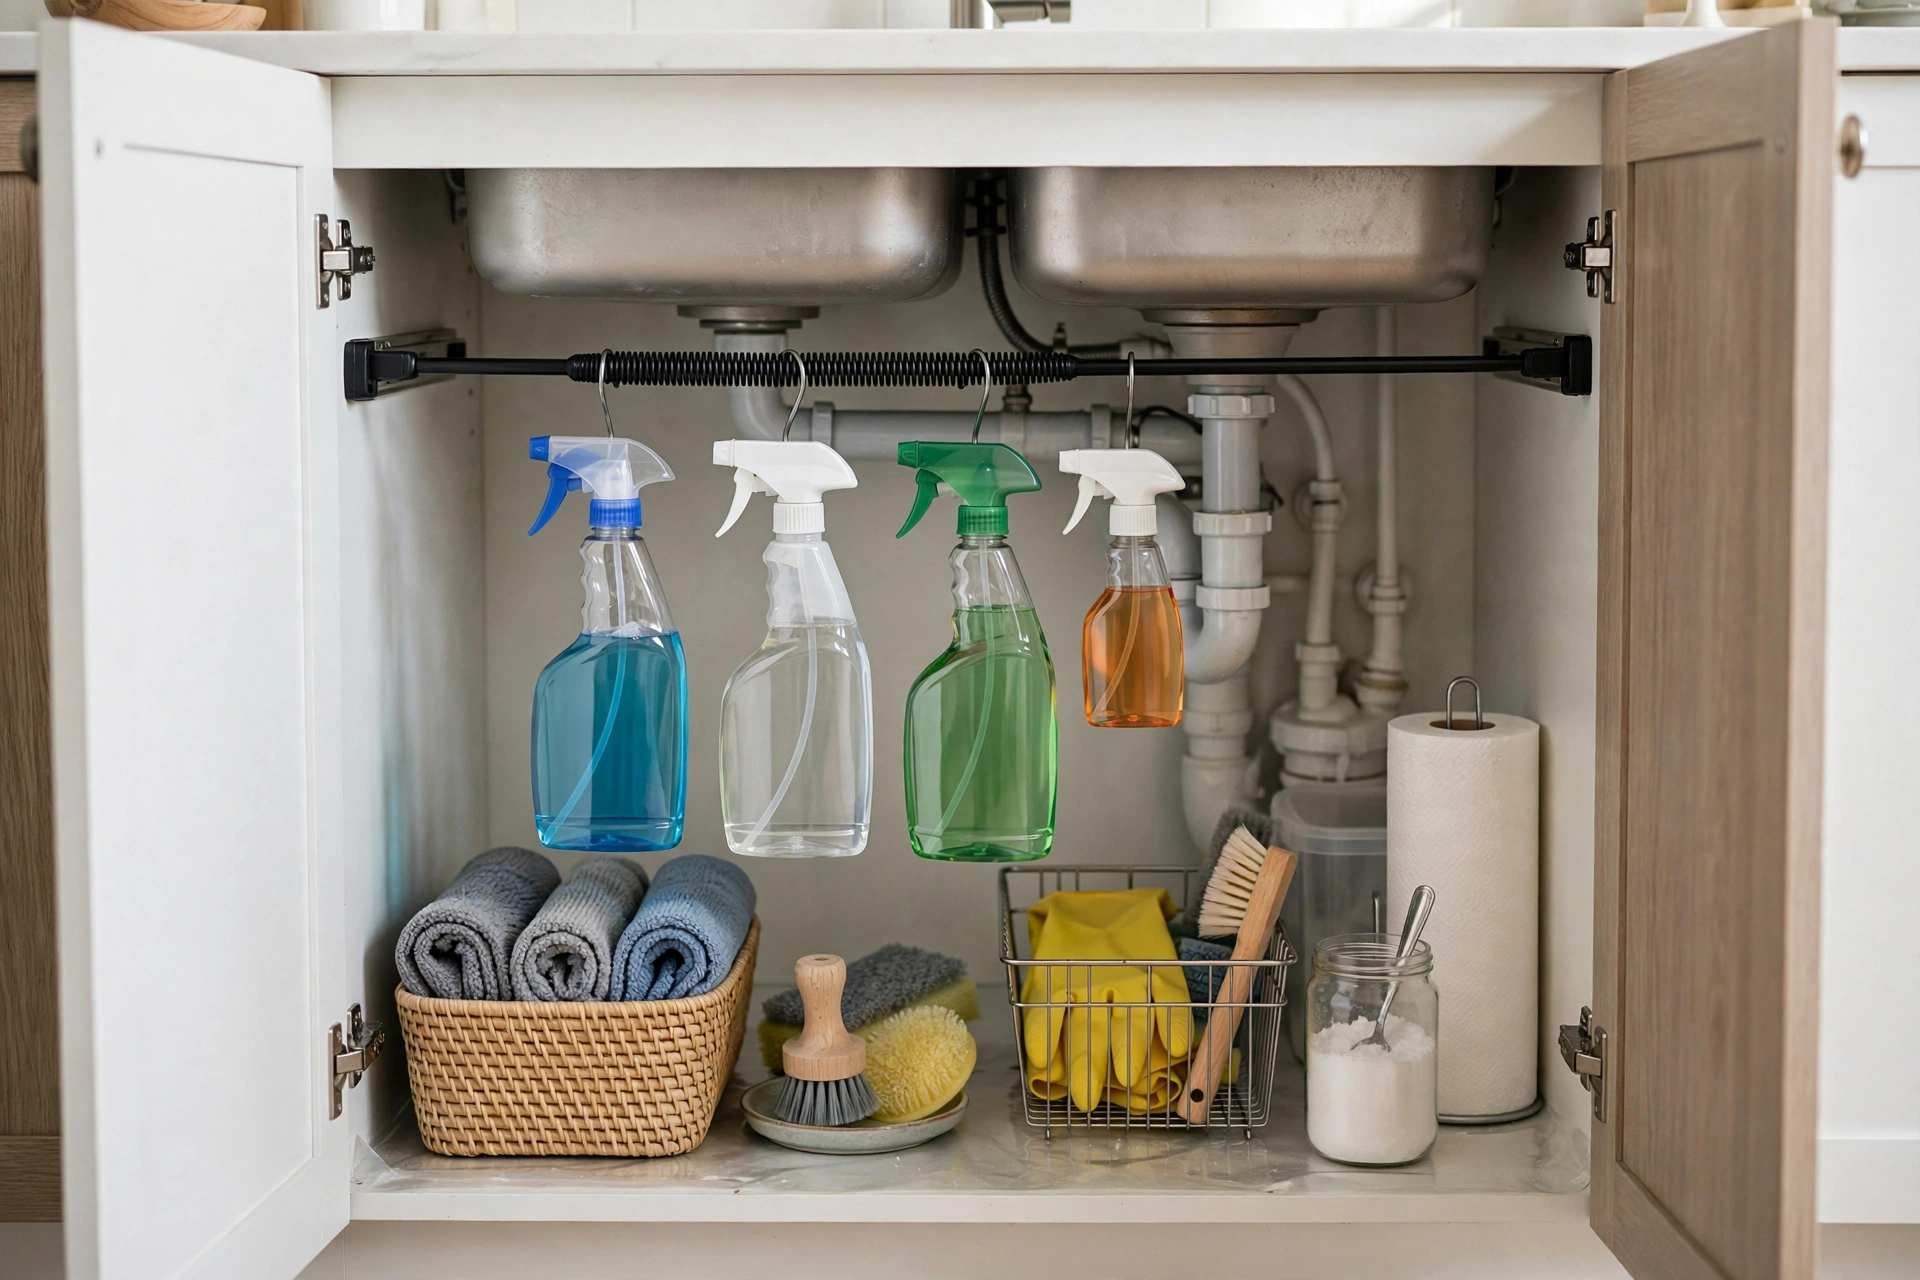
This is the single best dollar-for-dollar trick in this entire guide. Wedge a spring-loaded tension rod horizontally across the under-sink cabinet, a few inches below the top. Hang your spray bottles from it by their triggers. Suddenly the floor of the cabinet is free for bins, and every bottle is visible and grabbable.
Tension rods typically cost under $10, install in seconds with zero tools, and leave no marks — the definition of renter-friendly. Measure your cabinet width before you shop; most under-sink cabinets fit a standard adjustable rod. While you’re down there, it’s a good moment for keeping your kitchen sink drain clear without harsh chemicals, since you’ll finally be able to see what you’re working around.
Idea 2: Stackable Bins for Cleaning Supplies
With bottles hanging above, the cabinet floor becomes prime real estate. Add two stackable plastic bins — one for dishwashing supplies, one for trash bags and sponges. Dollar store bins work perfectly here; they typically cost just over a dollar each and come in sizes that fit around pipes.
The magic is categorization, not the container. When the sponge bin is empty, you know you’re out of sponges. No more digging, no more duplicates. Line the cabinet floor with a cheap waterproof mat first (typically under $8) to protect against the inevitable leak.
Zone 2: Cabinets and Pantry
Cabinets are where small kitchens hide their biggest inefficiency: a single shelf with six inches of dead air above every stack of plates. You’re paying rent for that vertical space — start using it.
Idea 3: Dollar-Store Bins With Labels
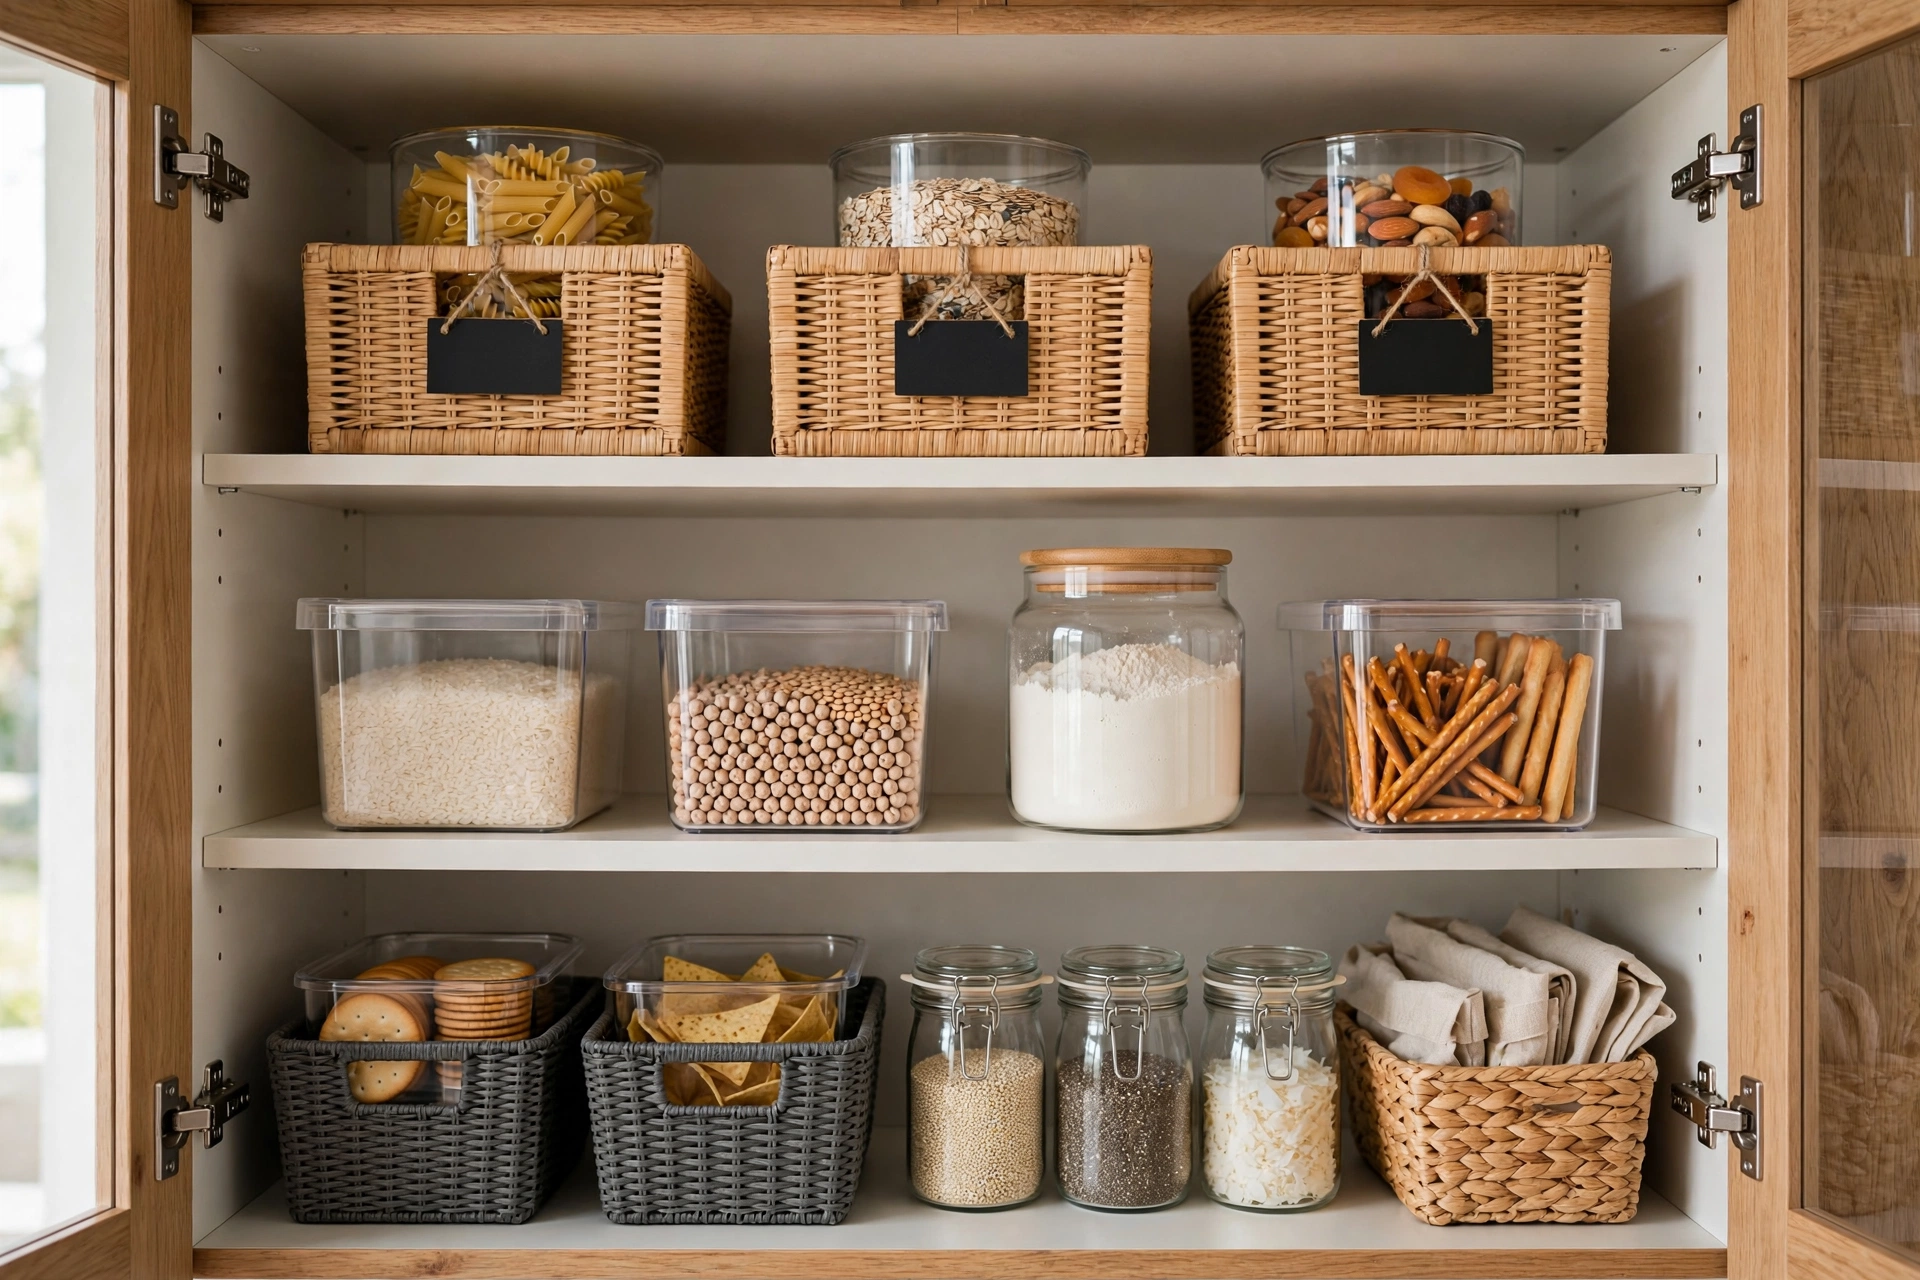
Turn deep pantry shelves into pull-out drawers with bins. Group like with like — baking, snacks, canned goods — one category per bin. Add simple adhesive labels so everyone in the household puts things back in the right place. A label maker is nice, but masking tape and a marker work just as well and cost almost nothing.
Bins typically run just over a dollar each at discount stores, so outfitting a whole pantry often costs under $10. The payoff is instant: no more avalanche of cans when you reach for the back row.
Idea 4: Shelf Risers That Double Cabinet Space
A wire or bamboo shelf riser sits inside your cabinet and creates a second level, so mugs go below and bowls go above instead of everything stacking into a wobbly tower. Risers typically cost under $15 and need no installation — they just sit there.
This one idea can genuinely double the usable shelf space in a crowded cabinet. Use them for dishes, canned goods, or spices. If you buy only one thing from this list, make it two shelf risers for your most chaotic cabinet.
Idea 5: Over-Cabinet-Door Baskets
The inside of a cabinet door is free storage most people ignore. A wire basket that hooks over the door (no screws, no adhesive) holds wraps, foil, cutting boards, or spices. They typically cost under $12 and lift off in seconds when you move out.
Measure your door thickness before buying — most baskets fit standard cabinet doors, but very thick or very thin doors can be an issue. This is one of the best small-space upgrades you can make anywhere in the home, kitchen or bath.
Zone 3: Countertops
Counter space is the most valuable real estate in a small kitchen, and cluttered counters make the whole room feel smaller. The goal here isn’t more storage — it’s less stuff living on the counter permanently.
Idea 6: The One-Tray Rule
Corral the daily essentials — olive oil, salt, pepper, dish soap — onto a single tray or small turntable. Everything else goes in a cabinet. The tray keeps the counter looking intentional instead of chaotic, and wiping down the counter takes ten seconds because you just lift one tray.
A simple wooden or metal tray typically costs under $15, and you probably already own something that works. This costs nothing if you repurpose a cutting board or baking sheet you already have.
Idea 7: A Roll-Up Over-the-Sink Dish Rack
A traditional dish rack eats a full square foot of counter. A roll-up rack sits over the sink itself, so dishes dry directly above the drain and the rack rolls away when you’re done. They typically cost under $20, fit most standard sinks, and free up shocking amounts of counter space.
If you hand-wash dishes daily, this single swap reclaims more counter than any other idea in this zone. Rinse, roll, done.
Zone 4: Drawers
Kitchen drawers become junk drawers the moment small items have nowhere specific to go. The fix is embarrassingly simple.
Idea 8: Drawer Dividers From the Dollar Store
Adjustable bamboo dividers or simple plastic trays turn one chaotic utensil drawer into six tidy compartments. Dividers typically cost under $10 for a set, and the expandable kind fit almost any drawer without measuring.
Sort ruthlessly first: keep one good spatula, not four mediocre ones. Then give every category — cooking utensils, baking tools, gadgets — its own compartment. When something doesn’t have a compartment, that’s your signal it doesn’t belong in the drawer.
Zone 5: Walls and Vertical Space
Walls are the most underused square footage in a small kitchen. Everything you hang on a wall is something that isn’t clogging a drawer or cabinet.
Idea 9: A Magnetic Knife Strip
A magnetic strip mounted with removable adhesive strips (not screws) holds knives, scissors, and even small metal tools on the wall. It frees an entire drawer or counter block, keeps blades visible and safe, and typically costs under $15.
Use the heavy-duty removable strips rated for the weight, and mount on a smooth surface like tile or painted drywall — not textured walls. Press firmly for 30 seconds and let the adhesive cure for an hour before hanging knives.
Idea 10: A Wall Rail With Hooks
A short kitchen rail with S-hooks holds utensils, mugs, scissors, and small pans right where you cook. Rails typically cost under $20, mount with removable adhesive or over-cabinet hooks, and turn dead wall space between counter and upper cabinets into working storage.
Hang only what you use weekly — this is prime real estate, not decoration. The visual payoff is real, too: a tidy rail of everyday tools makes a small kitchen look like a chef’s kitchen. Browse affordable kitchen rail systems for renter-friendly mounting options.
Idea 11: Magnetic Spice Tins on the Fridge Side
Spices are the classic small-kitchen space thief: dozens of tiny jars colonizing a whole cabinet. Magnetic spice containers stick to the side of your fridge or any metal surface, turning dead space into a spice wall. A set typically costs under $15.
Label the lids (not the sides) so you can read them at a glance. This frees an entire cabinet shelf while keeping every spice visible — a genuine two-for-one upgrade.
Zone 6: The Fridge and Forgotten Corners
The last zone is wherever things go to be forgotten: the back of the fridge, the deep corner cabinet, the space above the fridge.
Idea 12: Lazy Susan Turntables
A turntable in the fridge or a deep cabinet means nothing hides in the back anymore — spin and everything comes to you. Small turntables typically cost under $12 each, need zero installation, and work in fridges, pantries, and under-sink cabinets alike.
Use one for condiments in the fridge door area and another for oils and vinegars in a deep cabinet. Food waste drops because you actually see what you have before it expires. For more inspiration, browse small kitchen organization ideas from home editors who test these setups for a living.
How to Organize a Small Kitchen on a Budget — All 12 Ideas Compared
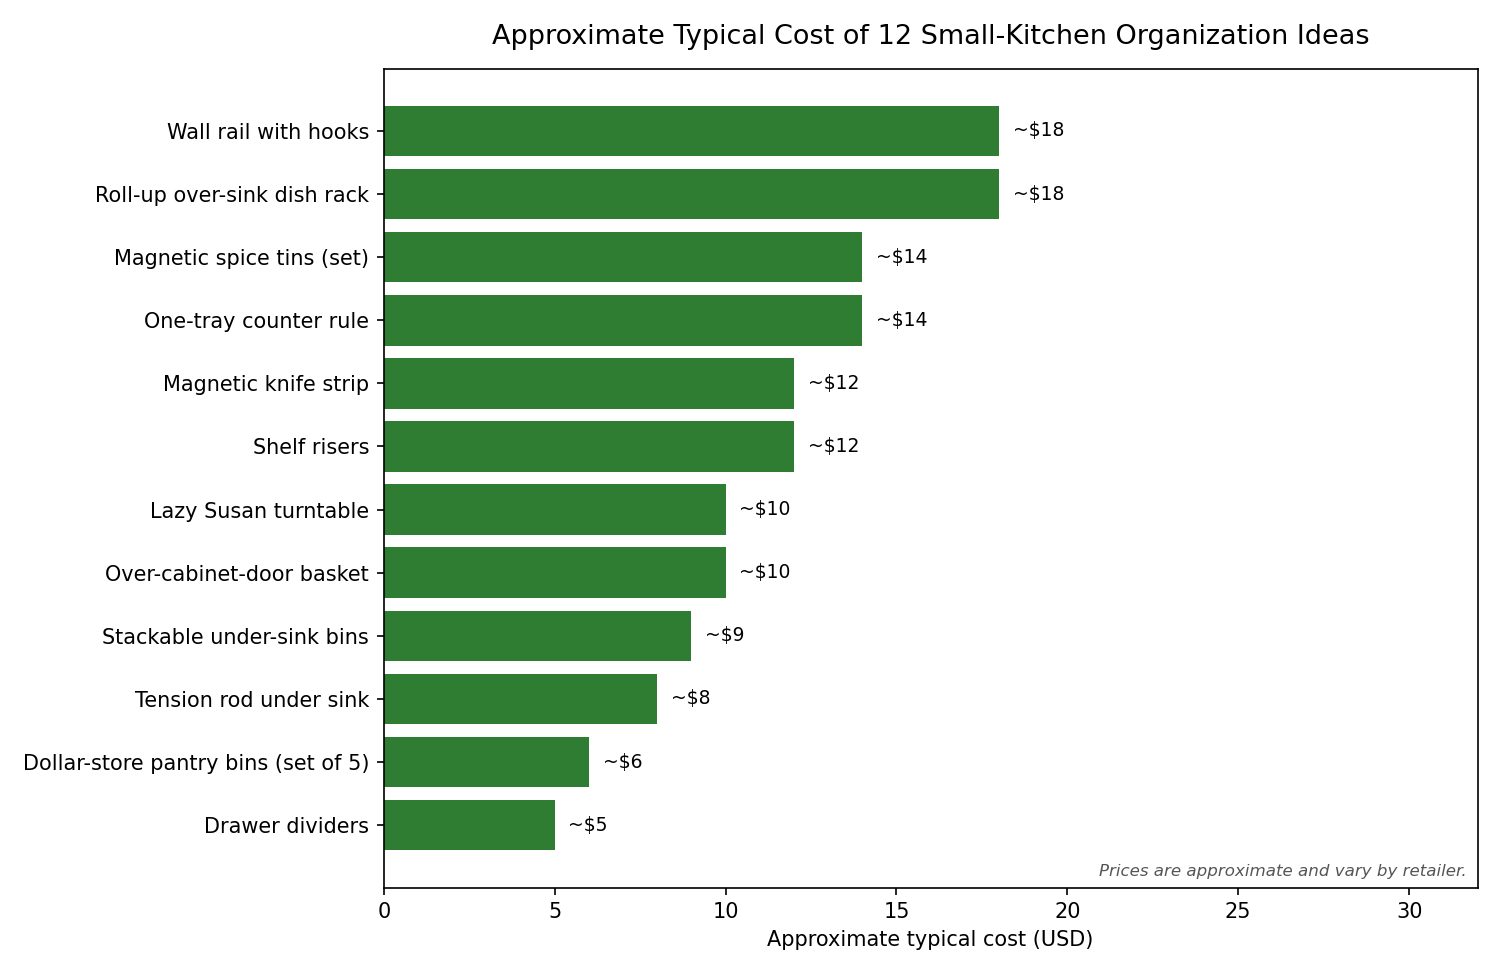
Here is every idea side by side, with approximate typical costs, renter-friendliness, and difficulty. Costs are approximate — actual prices vary by retailer and region.
| Idea | Typical Cost | Renter-Friendly | Difficulty |
|---|---|---|---|
| Tension rod under the sink | Under $10 | Yes — no tools | Easy |
| Stackable under-sink bins | Under $15 | Yes | Easy |
| Dollar-store pantry bins + labels | Under $10 | Yes | Easy |
| Shelf risers | Under $15 | Yes | Easy |
| Over-cabinet-door baskets | Under $12 | Yes | Easy |
| One-tray counter rule | Under $15 | Yes | Easy |
| Roll-up over-sink dish rack | Under $20 | Yes | Easy |
| Drawer dividers | Under $10 | Yes | Easy |
| Magnetic knife strip | Under $15 | Yes — removable adhesive | Medium |
| Wall rail with hooks | Under $20 | Yes — removable adhesive | Medium |
| Magnetic spice tins | Under $15 | Yes | Easy |
| Lazy Susan turntables | Under $12 | Yes | Easy |
A $60 Weekend Plan: Putting It Together
When you tackle how to organize a small kitchen on a budget, don’t try all 12 ideas at a time — you’ll burn out by Saturday afternoon. Instead, run this plan. Saturday morning: declutter one zone at a time and take a donation bag to the door (one hour). Saturday afternoon: install the tension rod, place under-sink bins, and add shelf risers to your worst cabinet (one hour, roughly $30 of supplies). Sunday: bin and label the pantry, divide the utensil drawer, and hang the magnetic strip or rail (one hour, roughly $30 more).
Total damage: one weekend, about $60, and a kitchen that finally works the way you cook. Start with the zone that annoys you most — early wins keep you motivated for the rest.
Frequently Asked Questions
How can I organize a small kitchen with no pantry?
Treat a single cabinet as your pantry using bins (Idea 3), add shelf risers to double its capacity (Idea 4), and move overflow to the walls with a rail or magnetic spice tins (Ideas 10–11). A rolling cart — typically under $30 — can also serve as a portable pantry if you have a spare corner.
What is the cheapest way to organize kitchen cabinets?
Dollar-store bins with labels, usually just over a dollar each. Grouping items by category into bins costs under $10 for a whole cabinet and delivers the biggest visible improvement per dollar of anything in this guide.
How do renters organize a kitchen without drilling?
Use tension rods, over-door hooks, removable adhesive strips, magnetic containers, and freestanding risers and turntables. Every idea in this guide is renter-friendly — nothing here requires drilling, screws, or permanent adhesive.
How do I keep my small kitchen organized long-term?
Give everything a labeled home and follow the one-in-one-out rule: when a new gadget arrives, an old one leaves. Do a five-minute reset each night — put wandering items back in their zones — and the system maintains itself.
Should I buy a matching container set?
Not at first. Matching sets look great on social media but cost far more than mixed bins that work exactly as well. Organize with cheap bins first; upgrade to matching containers later only for the zones you see every day, like open shelving.
Conclusion
Figuring out how to organize a small kitchen on a budget comes down to zones, not square footage. Assign every item a home, exploit vertical space, and let cheap tools like tension rods and dollar-store bins do the heavy lifting. You don’t need a remodel or a big budget — a $60 weekend and the 12 ideas above will transform how your kitchen feels and functions. Start with your most annoying zone today, and build from there.



[…] plan the whole space at once; if your cabinets and counters are in the mix too, read our guide to organizing a small kitchen on a budget before you start […]