
Learning how to paint a room is one of the highest-value DIY skills you can pick up. A fresh coat of paint can completely transform a tired space in a single weekend, and it costs a fraction of what a professional painter charges. Yet most beginners make the same handful of mistakes: skipping prep, buying the wrong finish, or overloading the roller until the walls are streaked with drips.
This guide walks you through the entire process the way a pro would do it — from choosing the right paint finish and calculating how much paint to buy, to prepping the room, cutting in clean edges, rolling smooth coats, and cleaning up. Follow these steps and your first paint job will look like you hired someone.
How to Paint a Room: Start With a Plan
Before you open a single can, decide on three things: the color, the finish (sheen), and the scope. Are you painting just the walls, or the ceiling and trim too? Painting the ceiling first is standard practice because drips fall downward — you don’t want to spatter a freshly painted wall.
Test your color before committing. Paint large swatches — at least 2 feet square — on two different walls and live with them for a full day. Colors shift dramatically between morning sunlight, evening lamplight, and overcast afternoons. Most paint stores sell inexpensive sample pots, and that small investment has saved countless homeowners from repainting an entire room in the wrong shade.
Choose the Right Paint Finish for Each Room
Paint “finish” or “sheen” determines how much light the dried paint reflects, and it matters more than most beginners realize. Flatter finishes hide wall imperfections but are harder to clean; glossier finishes wipe clean easily but highlight every bump and brush mark.
- Flat/Matte: Best for ceilings and low-traffic bedrooms. Hides imperfections beautifully but scuffs easily and doesn’t wash well.
- Eggshell: The all-rounder for living rooms, dining rooms, and hallways. Subtle sheen, reasonably washable, forgiving on imperfect walls.
- Satin: Slightly glossier than eggshell. A great choice for kitchens, laundry rooms, and kids’ bedrooms because it stands up to scrubbing.
- Semi-gloss: The standard for trim, doors, baseboards, and bathrooms. Moisture-resistant and very easy to wipe down, but it will show every flaw in the surface underneath — so prep matters.
If you’re painting a bathroom, check out our breakdown of small bathroom remodel costs to see where a fresh coat of paint fits into a bigger refresh. And if the kitchen is your target, a new wall color pairs perfectly with organizing a small kitchen on a budget for a full-room transformation.
How Much Paint Do You Need?
Running out of paint mid-wall is a classic beginner disaster — the second batch may not match exactly, even with the same color code. The standard rule of thumb is that one gallon of interior latex paint covers about 350 square feet per coat, according to manufacturer specifications published by major brands like Behr.
To estimate your room: measure the length and width, and multiply the perimeter by the ceiling height to get wall square footage. Then divide by 350 and multiply by two coats. The chart below does the math for common room sizes with 8-foot ceilings:
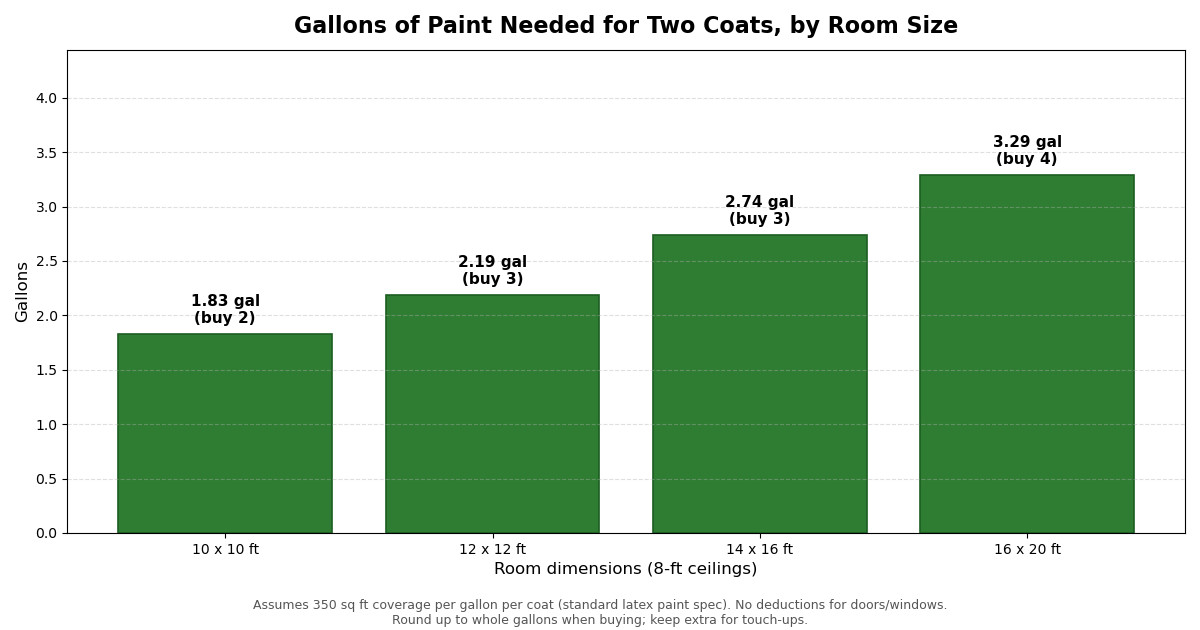
Always round up to whole gallons and buy a little extra — a quart left over for touch-ups is worth its weight in gold when a scuff appears six months later. Dark or dramatic color changes (painting over deep red with light gray, for example) may need a third coat or a tinted primer, so budget accordingly.
Gather Your Tools and Supplies
Good tools are the difference between a weekend of frustration and a genuinely enjoyable project. You don’t need the most expensive gear, but avoid the bargain-bin brushes that shed bristles into your finish.
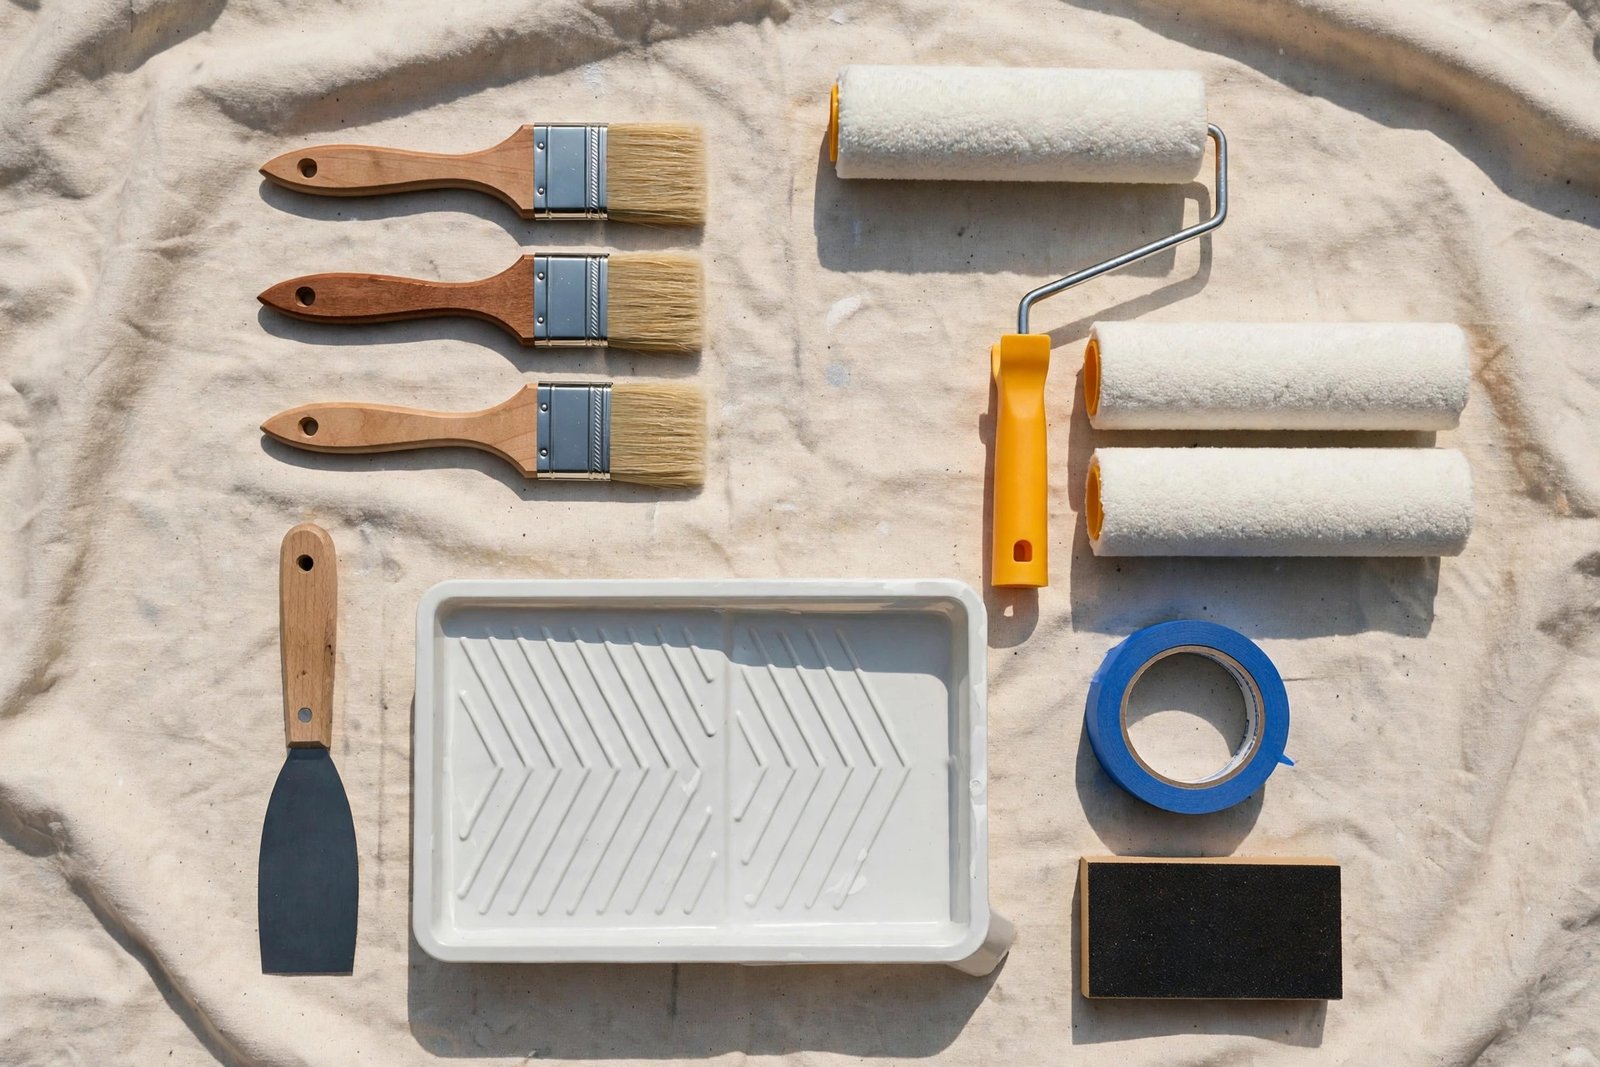
- Paint: Interior latex (water-based) paint in your chosen color and finish — plus ceiling paint if needed.
- Primer: Essential when painting over dark colors, bare drywall, patched spots, or glossy existing paint.
- Brushes: One 2.5-inch angled sash brush for cutting in edges and trim.
- Rollers: A 9-inch roller frame with 3/8-inch nap covers for smooth walls (1/2-inch nap for lightly textured walls). Buy covers in a multi-pack — they’re cheap.
- Paint tray with liner, 5-in-1 tool, putty knife, lightweight spackle, 120-grit sandpaper, and a sturdy extension pole for the roller.
Prep the Room Like a Professional
Here’s the truth professionals will tell you: prep work is 70% of a great paint job. The actual painting is the easy part. Rushing prep is why DIY paint jobs look DIY.
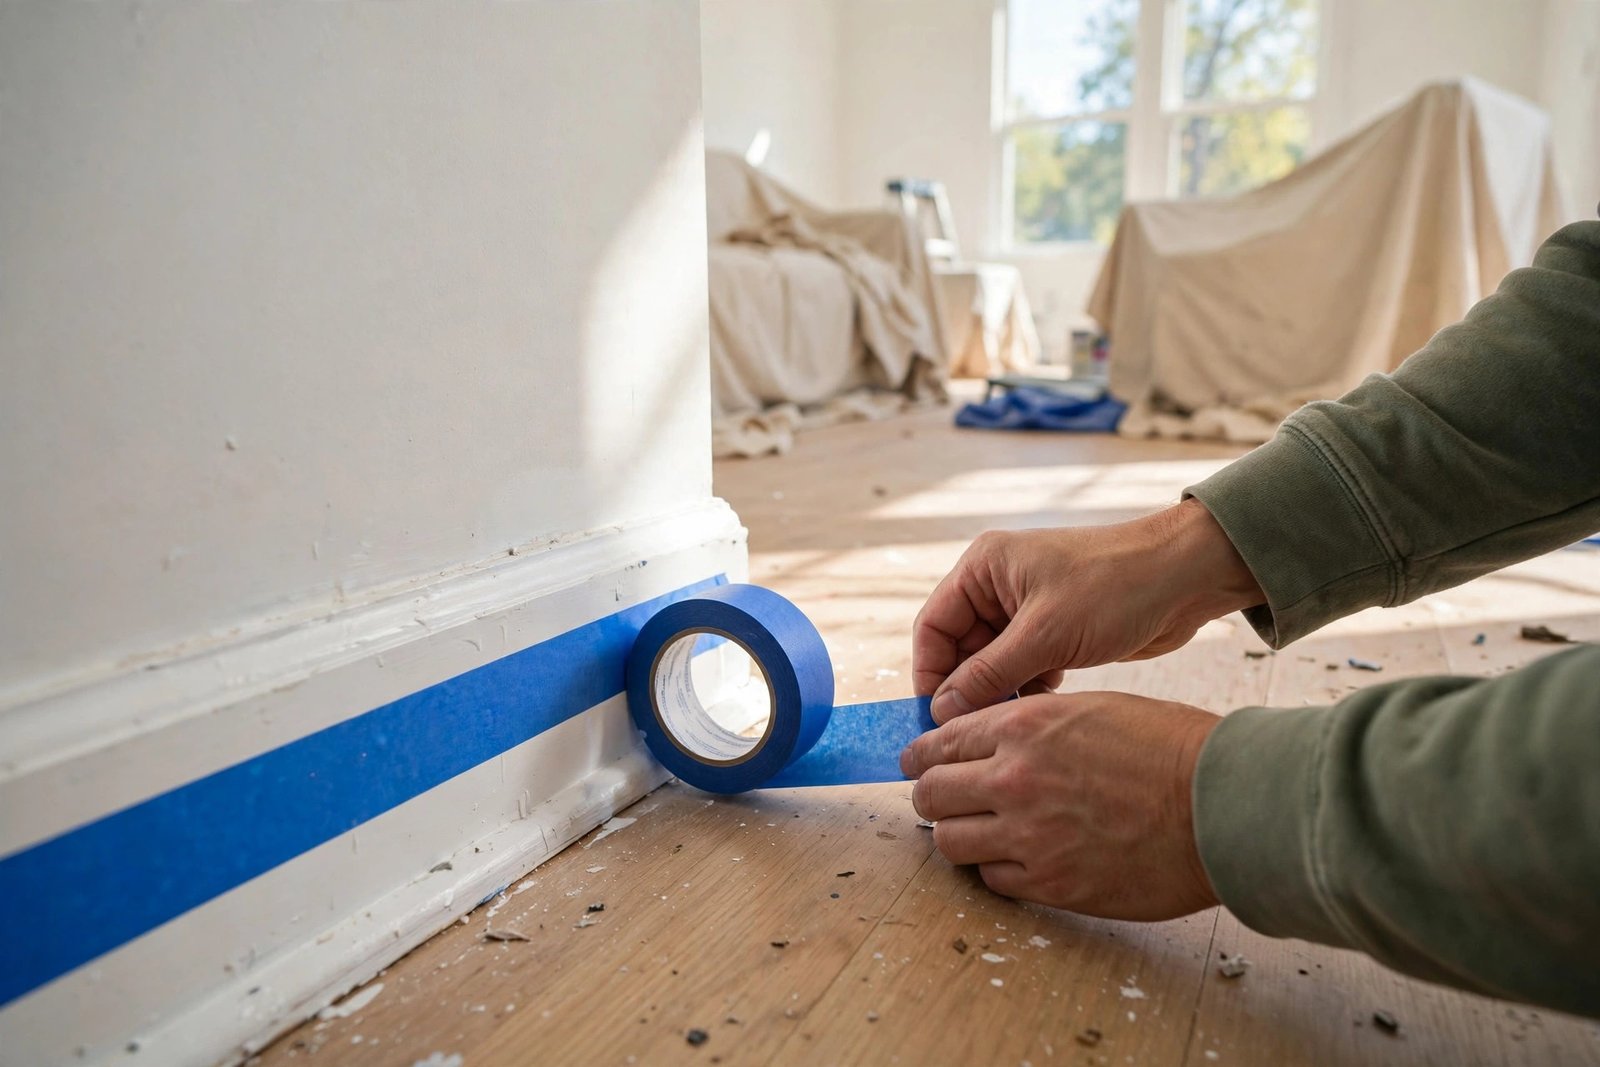
- Clear the room. Move furniture to the center and cover everything with drop cloths, or move smaller pieces out entirely. Remove wall plates, outlet covers, curtain hardware, and vent covers — it’s far faster than taping around them.
- Clean the walls. Dust and grease prevent paint from adhering. Wipe walls with a damp cloth and mild detergent, especially in kitchens where cooking residue builds up near the stove.
- Repair damage. Fill nail holes and small cracks with lightweight spackle, let it dry, then sand smooth with 120-grit sandpaper. For larger holes, use a self-adhesive patch. Wipe away sanding dust with a damp cloth.
- Tape precisely. Apply painter’s tape along baseboards, window and door trim, and where walls meet the ceiling. Press the edge down firmly with a putty knife to seal it — this is what prevents paint bleeding underneath.
- Lay drop cloths. Cover the entire floor. Drips happen to everyone, and dried paint on carpet or hardwood is miserable to remove.
- Prime where needed. Spot-prime patched areas and any place where you’ve sanded down to bare material. If you’re making a dramatic color change, prime the whole wall with a primer tinted toward your new color.
Cut In the Edges First
“Cutting in” means painting the borders a roller can’t reach — along the ceiling line, corners, baseboards, and around trim — with a brush. Pros cut in one wall at a time, then immediately roll that wall while the brushed edges are still wet. This keeps a “wet edge” and prevents visible lap lines where brush and roller textures meet.
Load your angled brush about a third of the way up the bristles — never dunk it to the handle. Tap off the excess rather than wiping it on the can rim, which creates drips. Hold the brush like a pencil for control, and use long, smooth strokes about 2–3 inches wide along each edge. Don’t stress about perfection on the first pass; the roller will blend the transition.
Roll the Walls With the W Technique
Now the satisfying part. Pour paint into the tray, load the roller evenly by rolling it back and forth on the tray’s ridged section — the cover should be saturated but not dripping.
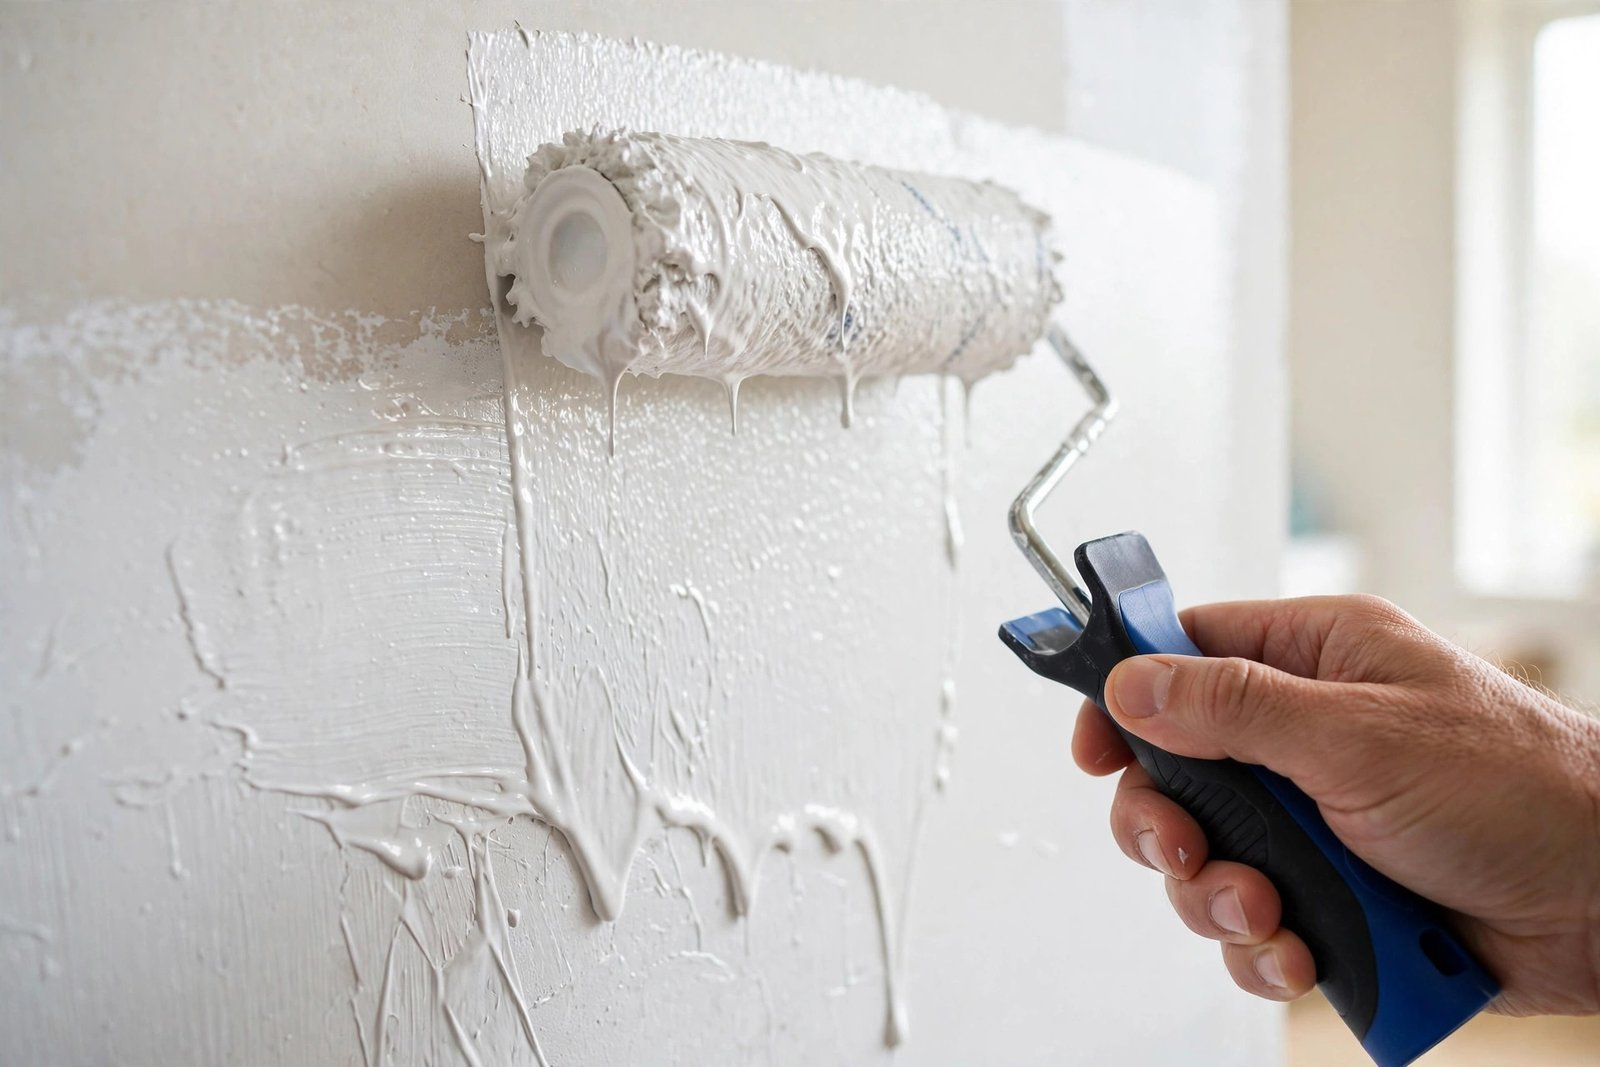
Start about a foot away from the corner and roll a large “W” or “M” pattern roughly 3 feet square, then fill it in with parallel vertical strokes without lifting the roller. This distributes paint evenly and avoids the streaky stripes beginners get from rolling in single straight lines. Work in sections, always overlapping into the still-wet previous section to maintain that wet edge.
Use light, even pressure. Pressing hard squeezes paint out of the roller and creates ridges and drips — let the roller’s weight do the work. If you spot a drip or a heavy spot, smooth it immediately with light roller passes before it starts to set.
Let It Dry, Then Apply the Second Coat
Most latex paints are dry to the touch in 1–2 hours and ready for recoating in about 4 hours, but always check the can — temperature and humidity change drying times. Cool, damp rooms dry slowly; if possible, improve ventilation with a fan (pointed away from wet walls so it doesn’t blow dust onto them).
Evaluate the first coat in raking light — shine a work light along the wall at an angle to reveal thin spots, roller marks, and holidays (missed patches). The second coat is what gives the color its full richness and evenness; virtually no paint job looks professional after a single coat, no matter what the label claims.
Remove Tape and Handle Cleanup
Pull painter’s tape while the final coat is still slightly tacky or after it’s fully dry — but not in between, when semi-dry paint can peel off with the tape. Pull slowly at a 45-degree angle back on itself for the cleanest line.
Touch up any bleeds or nicks with your angled brush and the leftover paint. Then clean up: latex paint washes out of brushes and rollers with warm water and a little dish soap. Comb the brush bristles straight, reshape them, and hang brushes to dry. Seal leftover paint cans tightly, label them with the room and date, and store them for future touch-ups.
Common Mistakes Beginners Make
- Skipping primer on repairs and dramatic color changes — patched spots and old dark colors will ghost through two coats of new paint.
- Painting in poor light — you’ll miss thin spots. Paint during daylight or bring in bright work lights.
- Overloading the brush or roller — the number one cause of drips, runs, and sagging paint.
- Letting edges dry before rolling — always cut in and roll one wall at a time to keep a wet edge.
- Buying cheap brushes and rollers — they shed, streak, and hold less paint, which actually slows you down.
- Not buying enough paint — use the chart above, round up, and keep extra for touch-ups.
For more hands-on home project guidance, see our guide on how to fix a leaky faucet — it’s another beginner-friendly repair that pairs well with a room refresh.
Frequently Asked Questions
How long does it take to paint a room?
For an average 12×12 bedroom, plan one full day: 2–3 hours of prep, 2–3 hours of painting including dry time between coats, and an hour of cleanup. Your first room will take longer than your third — cutting in gets much faster with practice.
Do I need to prime before painting?
Not always, but you should prime over bare drywall, patched areas, stains, dark colors being covered with light colors, and glossy existing finishes. When in doubt, spot-priming is cheap insurance for an even finish.
What’s the best paint finish for bedroom walls?
Eggshell is the most popular choice for bedrooms — it has a soft, low sheen that hides minor wall imperfections while still being washable. Use flat or matte on ceilings and semi-gloss on trim and doors.
Can I paint over existing paint without sanding?
Usually yes, if the existing paint is in good condition — just clean the walls first. Sand lightly if the old finish is glossy, since paint adheres poorly to slick surfaces. Always sand patched and repaired spots smooth.
How do I get clean lines without painter’s tape?
Experienced painters cut in freehand with a high-quality angled brush and a steady hand. If you’re new, tape is far more reliable. The key to crisp taped lines is sealing the tape edge firmly and removing it at the right time — while the paint is tacky or fully dry.
Why does my paint look streaky after drying?
Streaks usually come from overworking the paint (rolling back over partially dried areas), pressing too hard, or letting cut-in edges dry before rolling. Maintain a wet edge, use light pressure, and apply a proper second coat — most streaking disappears under coat two.
Conclusion
Knowing how to paint a room properly comes down to a simple formula: plan your color and finish, buy enough quality paint, prep thoroughly, cut in and roll with a wet edge, and don’t skip the second coat. It’s a weekend project with an outsized payoff — few DIY jobs transform a space so completely for so little money. Take your time with the prep, keep a wet edge while you work, and you’ll end up with walls that look like a professional did them. Now pick a color and get started — your room is waiting.
For technique walkthroughs and product comparisons from experienced painters, Family Handyman’s painting guides are a reliable reference worth bookmarking.