
How to Unclog a Drain Without Chemicals: 7 Methods That Actually Work
Learning how to unclog a drain without chemicals is one of the most useful DIY skills a homeowner can have. Chemical drain cleaners are harsh on pipes, bad for septic systems, and dangerous to handle — and in many cases, they don’t even work on the kind of clog you have. The good news is that most slow or blocked drains can be cleared with heat, pressure, simple tools, and a little patience.
This guide walks you through seven methods, ordered from gentlest to strongest — start at the top and work down. Most clogs give up by method four or five, and you’ll know exactly when to call a plumber.
How to Unclog a Drain Without Chemicals: Start With the Right Diagnosis
Before you try anything, figure out what you’re dealing with. Different clogs respond to different methods:
- Kitchen sink draining slowly: usually grease, oil, or food residue coating the pipe walls. Heat-based methods work best here.
- Bathroom sink or tub draining slowly: almost always hair mixed with soap scum. The clog is often just below the drain opening, within easy reach.
- Toilet or multiple fixtures backing up: stop. If more than one drain is affected, or you hear gurgling from other fixtures, the blockage is likely in the main line — that’s plumber territory, not a DIY job.
- Standing water that won’t budge: skip the water-based methods and go straight to mechanical ones (plunger, snake, or P-trap).
Safety first: if anyone has already poured a chemical drain cleaner down this drain, wear rubber gloves and eye protection for every method below, and never plunge aggressively — you don’t want that stuff splashing back at you. If your home has PVC drain pipes (common in homes built after the 1970s), skip the boiling-water method and use very hot tap water instead, since repeated exposure to boiling water can soften plastic pipes and loosen joints.
The 7 Methods, From Gentlest to Strongest
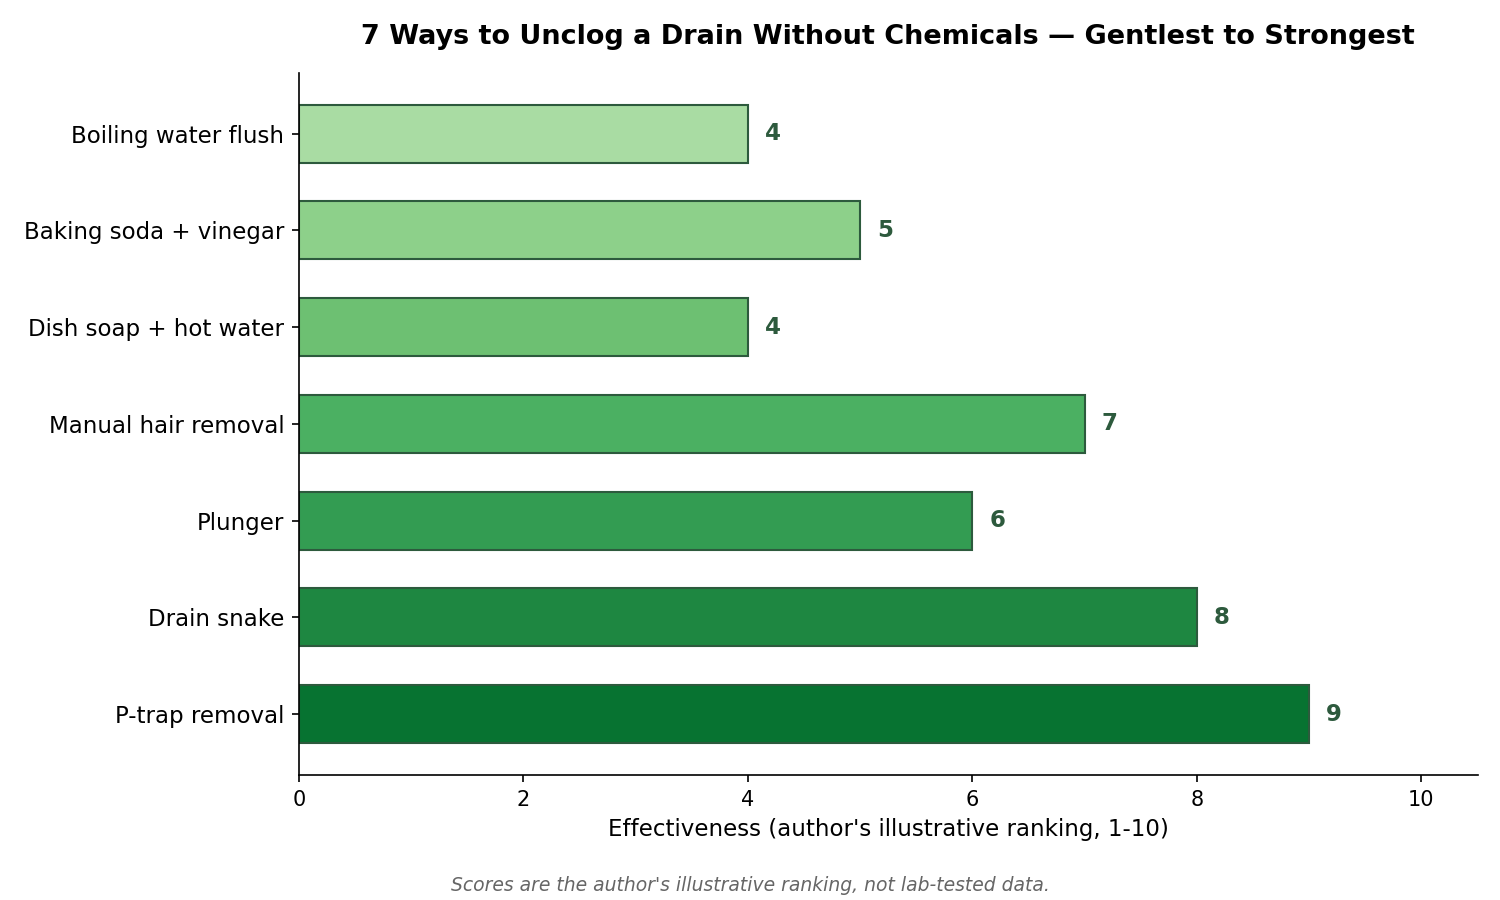
Below are the seven methods for how to unclog a drain without chemicals, in order. Each one is stronger than the last, so begin with method 1 and move down only if the drain is still slow.
Method 1: The Boiling Water Flush
Best for: kitchen sinks with grease buildup, bathroom sinks with soap scum. Cost: nothing. Difficulty: trivial.
Grease and soap scum melt. A kettle of boiling water poured directly down the drain can dissolve the soft buildup narrowing your pipes — and it takes about five minutes.
- Boil a full kettle of water (a standard kettle holds roughly 1.5 liters, which is the right amount for one treatment).
- Pour slowly, in two or three stages, pausing a few seconds between pours so the heat can work on the buildup rather than just rushing past it.
- Test the drain with tap water. For light buildup, one kettle is often enough; for a stubborn grease clog, repeat two or three times.
Skip this method if your pipes are PVC and the clog is close to the drain opening — use the hottest water your tap produces instead. Cast iron and copper pipes handle boiling water without any issue. This method won’t help with hair or solid blockages; for those, keep reading.
Method 2: Baking Soda and Vinegar
Best for: mild buildup and odors, monthly maintenance. Cost: pennies. Difficulty: easy.
This is the classic home remedy: half a cup of baking soda followed by half a cup of white vinegar. Let’s be honest about what it does — the fizzing reaction looks dramatic but is chemically mild. It loosens light residue and deodorizes, and the hot-water flush afterward does most of the actual clearing.
- Remove any standing water from the sink so the ingredients reach the clog.
- Pour about half a cup of baking soda directly into the drain, getting as much down the opening as possible.
- Follow with half a cup of white vinegar, then quickly cover the drain with a stopper or cloth to keep the fizzing working downward.
- Wait 15 to 30 minutes, then flush with hot water (boiling if your pipes allow it).
Think of this as maintenance rather than rescue: it’s great once a month to keep buildup from becoming a real clog, but don’t expect it to power through a serious blockage on its own.
Method 3: Dish Soap and Hot Water
Best for: greasy kitchen clogs. Cost: pennies. Difficulty: easy.
Dish soap is a degreaser — designed to cut through grease. For a kitchen sink slowed by cooking oils, this can succeed where plain hot water stalls.
- Squirt a generous amount of dish soap (a few tablespoons) directly into the drain.
- Follow with a kettle of hot water, poured in stages.
- Let it sit for 20 to 30 minutes so the soap can work on the grease, then flush with more hot water.
If your kitchen sees a lot of cooking, try this before anything mechanical. And if grease keeps coming back, the long-term fix is habit: wipe pans with a paper towel before washing, and never pour cooking oil down the drain. Keeping an organized kitchen makes these small good habits much easier to stick with.
Method 4: Remove the Stopper and Clear It by Hand
Best for: bathroom sinks and tubs (hair clogs). Cost: nothing, or a few dollars for a zip tool. Difficulty: easy, slightly gross.
A huge share of bathroom clogs sit within the first few inches of the drain. Hair wraps around the stopper mechanism and collects soap scum until water can barely pass.
- Remove the drain stopper (most pop-up stoppers lift out or unscrew; tub stoppers usually lift straight up).
- Put on rubber gloves and pull out whatever hair and gunk you can reach.
- For what you can’t reach, slide a barbed plastic drain strip (often called a zip tool, a few dollars at any hardware store) down the drain and draw it back up slowly — the barbs grab hair on the way out.
- Rinse the stopper, reinstall it, and run hot water to test.
This single step resolves an enormous number of bathroom sink and shower clogs. If you’re staring at a wad of hair on the end of the strip, congratulations — you’re done.
Method 5: Plunge It
Best for: stubborn clogs in sinks and tubs where water still moves a little. Cost: a few dollars for a cup plunger. Difficulty: easy, needs technique.
A plunger works through pressure and suction, not force. The most common mistake is plunging into air — without a water seal around the cup, you’re just pushing air around.
- Use a cup plunger (the simple rubber-cup kind), not a flange plunger — the flange type is designed for toilets.
- Remove the stopper and fill the sink or tub with a few inches of water, enough to cover the plunger’s cup.
- If the fixture has an overflow opening, block it with a wet cloth — otherwise pressure escapes there instead of pushing the clog.
- Seat the plunger firmly over the drain and pump vigorously up and down about 15 to 20 times, keeping the seal.
- Pull the plunger away sharply on the last stroke. Repeat two or three rounds if needed.
Do not plunge if a chemical cleaner was recently used in this drain — the splash-back risk isn’t worth it. In that case, wear gloves and eye protection and consider skipping straight to the snake.
Method 6: Snake the Drain
Best for: clogs deeper in the pipe that plunging can’t reach. Cost: $10–$30 for a hand auger. Difficulty: moderate.
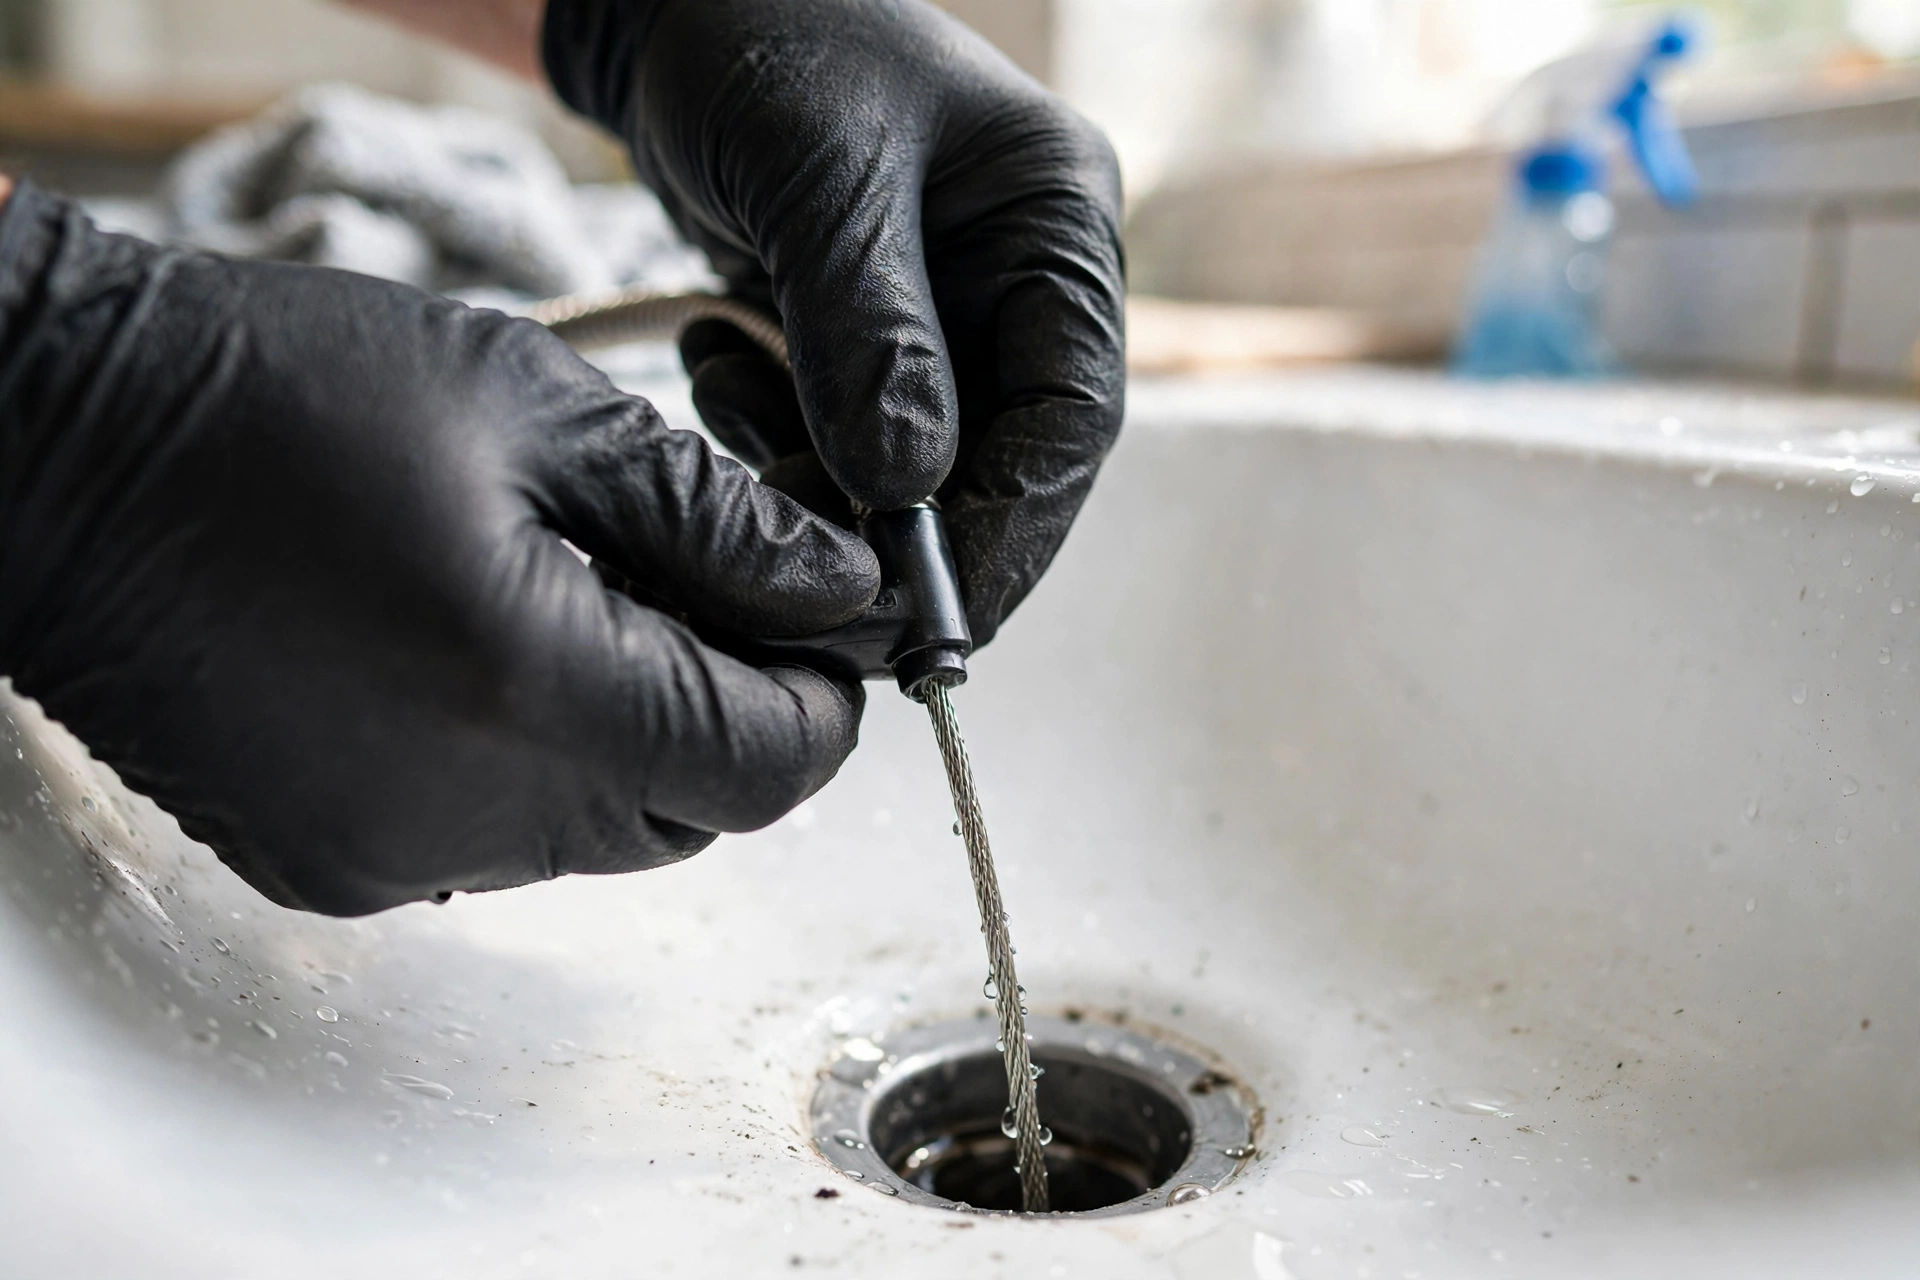
A drain snake (hand auger) is a flexible metal cable you feed into the pipe, cranking it as you go. It either hooks the clog so you can pull it out or breaks it apart so water can carry it away. This is the first method that reaches blockages well past the trap, and detailed drain snake techniques from plumbing pros all follow the same basic pattern.
- Remove the stopper. If the sink has standing water, bail most of it out first.
- Feed the snake’s tip into the drain opening, pushing gently while turning the crank handle clockwise.
- When you feel resistance, you’ve likely reached the clog. Keep turning — the corkscrew tip will bite into it.
- Either pull the snake back slowly to drag the clog out, or work the tip through the blockage to break it up, then flush with hot water.
- Clean the cable as you retract it; it’s going to be unpleasant, and that’s normal.
Go slowly and never force the cable — aggressive cranking can scratch porcelain or, in old pipes, do real damage. If the snake hits something hard and immovable a few feet in, that may be a pipe joint or a foreign object, and it’s a reasonable point to stop.
Method 7: Remove and Clean the P-Trap
Best for: clogs lodged in the trap itself, the most thorough DIY fix. Cost: nothing (maybe a bucket). Difficulty: moderate — basic comfort with a wrench helps.
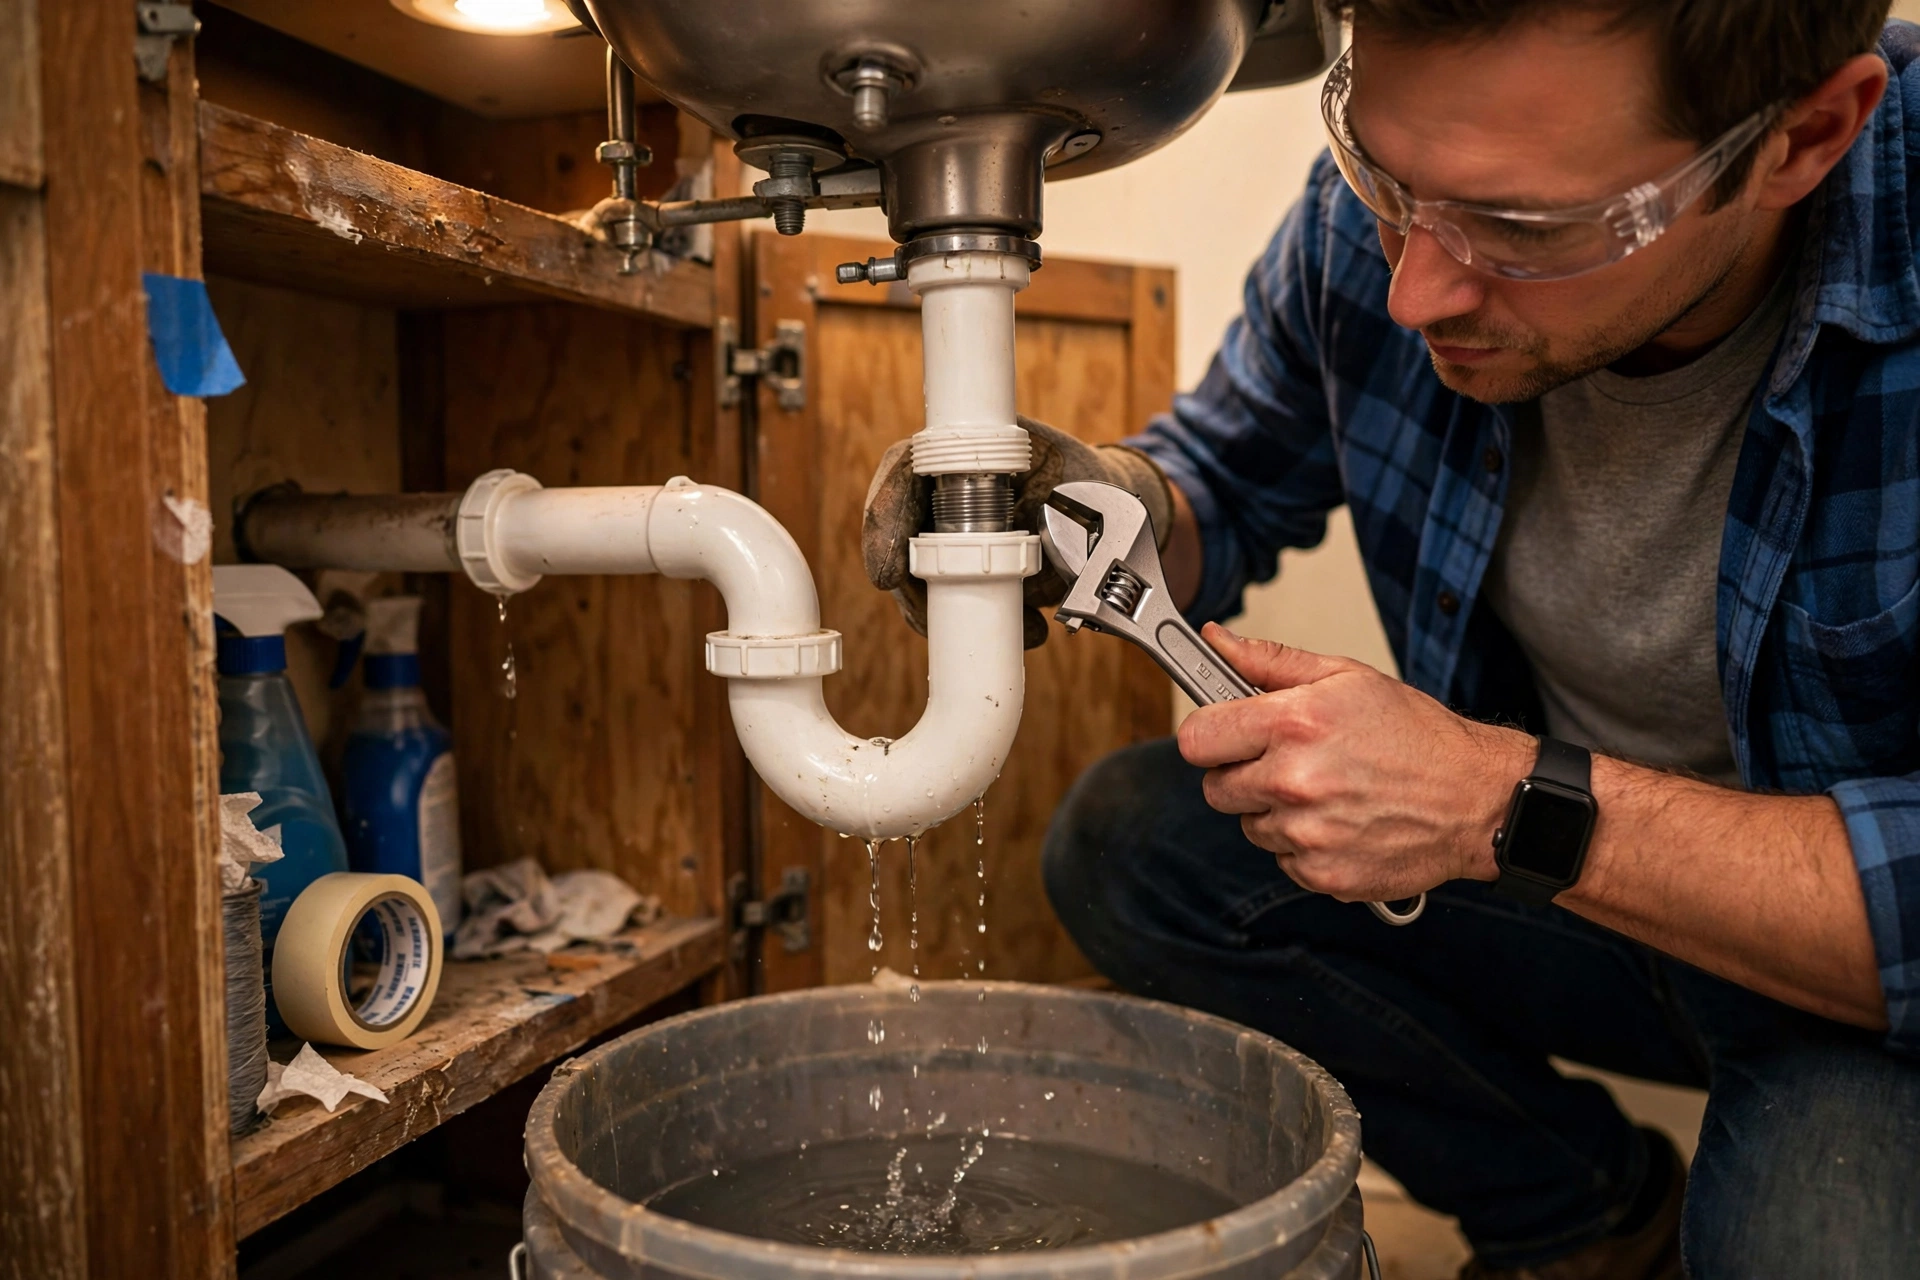
The P-trap is the U-shaped bend directly under your sink — the most common place for a clog to live. Removing it sounds intimidating, but the slip nuts are designed to be loosened by hand.
- Clear out under the sink and place a bucket directly beneath the trap — it holds water, and it will spill.
- Try loosening the slip nuts (the ribbed rings at each end of the U-bend) by hand, turning counterclockwise. If they’re stuck, use channel-lock pliers gently.
- Pull the trap down and off. Dump its contents into the bucket — expect a surprising amount of sludge.
- Rinse the trap thoroughly, check the washers for cracks, and reassemble. Hand-tighten the nuts, then give them a small extra nudge with pliers — overtightening can crack plastic fittings.
- Run water for a minute and check every joint for drips.
While you’re under there, take a look at the general condition of the pipes. If you’re already thinking about bigger bathroom changes, our breakdown of small bathroom remodel costs can help you budget realistically.
Quick Comparison: Which Method Fits Your Clog
| Method | Difficulty | Cost | Best for |
|---|---|---|---|
| Boiling water flush | Very easy | Free | Grease and soap-scum buildup (metal pipes) |
| Baking soda + vinegar | Very easy | Pennies | Mild buildup, odors, monthly maintenance |
| Dish soap + hot water | Very easy | Pennies | Greasy kitchen sink clogs |
| Manual hair removal | Easy | Free – a few dollars | Bathroom hair clogs near the surface |
| Plunger | Easy | A few dollars | Stubborn sink/tub clogs with some water movement |
| Drain snake | Moderate | $10–$30 | Deeper clogs past the trap |
| P-trap removal | Moderate | Free | Clogs lodged in the trap; the thorough fix |
When to Stop DIY and Call a Plumber
When learning how to unclog a drain without chemicals, knowing your limit is part of doing DIY well. Call a professional if any of these apply:
- Multiple drains are slow or backing up. One slow sink is a local clog; several slow fixtures — or gurgling sounds from other drains when you run water — point to a main-line blockage. No amount of plunging fixes that.
- You smell sewage. A persistent sewer odor, especially combined with slow drains, can mean a venting problem or a sewer-line issue. Don’t breathe it in and experiment — get help.
- The clog keeps coming back. If the same drain clogs again within weeks of clearing it, something structural may be going on: pipe scale, a belly in the line, or root intrusion. A plumber’s camera inspection finds what DIY can’t.
- Water is backing up into other fixtures. Running the washing machine makes the toilet gurgle, or the shower fills when the sink drains — that’s a system-level problem.
- Your pipes are very old or fragile. Aggressive snaking in corroded galvanized pipes can puncture them. When in doubt about pipe condition, let a pro handle it.
There’s no shame in calling for backup. A service visit costs far less than a burst pipe or water damage, and a good plumber will often show you what went wrong so you can prevent it next time. For more plumber-approved ways to clear drains without harsh chemicals, professional plumbing guides cover the same progression from gentle to aggressive.
How to Keep Drains Clear in the First Place
Prevention beats every method on this list:
- Kitchen: never pour grease or cooking oil down the drain — wipe pans out first. Use a sink strainer to catch food scraps.
- Bathroom: install an inexpensive hair catcher over the drain, and clean your drain stopper weekly. A quick wipe prevents the hairball that becomes a clog.
- Everywhere: run hot water for 30 seconds after heavy use to keep soap and grease from settling. A monthly baking-soda-and-vinegar flush keeps buildup from accumulating.
Small plumbing habits compound over time — much like the other small fixes around the house, such as fixing a running toilet before it wastes hundreds of gallons.
Frequently Asked Questions
Does baking soda and vinegar really unclog drains?
This classic chemical-free drain cleaning method helps with mild buildup and odors, but be realistic: the fizzing reaction is gentle, and most of the clearing comes from the hot-water flush afterward. Great monthly maintenance — but for a serious clog, move on to the plunger or snake.
Can boiling water damage my pipes?
It can damage PVC (plastic) pipes — repeated exposure to boiling water may soften the plastic or loosen glued joints. For PVC pipes, use very hot tap water instead. Cast iron and copper handle boiling water fine.
Why won’t my plunger work on the sink?
Almost always one of three reasons: you’re using a toilet (flange) plunger instead of a cup plunger, there’s no water covering the cup to create a seal, or the overflow opening isn’t blocked so pressure escapes. Fix all three and try again.
Is it safe to remove the P-trap myself?
Yes, for most people — it’s designed to be removed, and the slip nuts usually loosen by hand. Put a bucket underneath first (the trap holds water), don’t overtighten when reassembling, and check for drips afterward. If the nuts are corroded solid or the pipes look fragile, call a plumber instead of forcing it.
What should I never put down a drain?
Grease and cooking oil, coffee grounds, “flushable” wipes (they aren’t, really), cotton balls, and dental floss — floss tangles into a net that catches everything else. When in doubt, use the trash can.
Conclusion
To learn how to unclog a drain without chemicals, work through the seven methods in order, respect the safety warnings — especially around PVC pipes and any drain that’s seen chemical cleaners — and you’ll clear the vast majority of slow drains without spending more than a few dollars.
And when the clog wins — multiple fixtures backing up, sewage smells, or the same blockage returning again and again — that’s not failure, that’s diagnosis. Calling a plumber at that point is the smart, money-saving move. For more practical bathroom sink fixes without harsh chemicals, the same gentle-to-strong approach applies to nearly every fixture in your home.



[…] cabinets fit a standard adjustable rod. While you’re down there, it’s a good moment for keeping your kitchen sink drain clear without harsh chemicals, since you’ll finally be able to see what you’re working […]
[…] Clear the drain first; see how to unclog a drain without harsh chemicals […]
[…] clearing under the sink, it’s a good moment to check for slow drips — our guide on how to unclog a drain without chemicals covers the easy fixes if you find gunk building up. For small kitchens especially, less stuff on […]
[…] swap damaged shingles — makes sense on a roof under 15 years old with localized damage, much like clearing a clogged drain beats repiping the house. Repair buys time; replacement buys […]